FINAL FANTASY VIII

FINAL FANTASY VIII

653 ratings
Permanent Missable Content related to Achievements
By lylat and 3 collaborators
Good thing I didn't permanently miss these achievements!
4
14
4
   
Award
Favorite
Favorited
Unfavorite
Disc 1 - Part 1
Balamb Garden
Quezacotl and Shiva GFs (Desk) - Not Missable, forced later when you talk to Quistis at the front gate.
  • After the opening cutscene, you'll end up with Quistis walking to class. After the brief meeting in class, you'll be tasked with talking to Quistis. Instead, interact with the desk that you were already sitting at to bring up a menu. Select 'Turn on the power and...' and then when the main page loads, select 'Tutorials' and you'll automatically receive beoth Quezacotl and Shiva.

7 Cards
  • Following the meeting in class, you be run into by a girl (Selphie). Offer to take her onto a tour and head to your right (the direction she ran from). The next screen contains an overview of a bridge to the elevator. Talk to the man on the bridge to receive 7 cards: Geezard, Funguar, Red Bat, Gayla, Gesper, Fastitocalon-F, Caterchipillar.

Occult Fan I (Library)
  • After finishing up the tour with Selphie at the directory, head to the right until you reach the library. Examine the second set of bookshelves from the left side to find this magazine.

Fire Cavern
Ifrit GF + Ifrit Card
  • Battle Reward for beating Ifrit

Overworld
  • If you follow the road leading out of Balamb Garden, you'll end up at Balamb City. Head inside and follow the path for two screens. You'll see this lady nearby. Challenge her and quit until her Trade Rule says 'All'. Any rule she plays, everyone in the nearby region will play. (This excludes the little kid you win Mini-Mog from). I suggest playing a few people here so you can build up some cards so you can go take on some slightly tougher opponents at the Garden.


Balamb Garden
Quistis Card (Cafeteria - guy in the back)
  • Asides from the Quistis card, you may want some Malboro cards. Of course, you'll take everything you can get for the Collector achievement.


MiniMog Card (Main hallway)
  • Note: This kid will NOT follow the region rules. He always plays on the trade rule 'One'.


Dollet mission
Elvoret Boss draw: Siren GF
  • Battle begins with just Biggs, then Wedge joins after a period of time. After you deal enough damage to Biggs and Wedge, Elvoret will blow them away. Immediately draw Siren from Elvoret. The ??? is Double.

Balamb
Timber Maniacs - Hotel or Train Station (doesn't matter which one you grab)
  • After the SeeD exam in Dollet, you'll ride the Vessel back to Balamb. Go south and you'll be at the spiral with a hotel in the middle. Enter it and take the stairs to the left to enter the bedroom. Examine the desk to the right of the save point.


Zell Card (Zell's house)
  • Zell's house is the house on the right, closest to the bottom in the area with the draw point for Thunder.


Balamb Garden
  • After graduation, talk to Cid to receive the Battle Meter.

Weapons Mon Apr (Squall's room after graduation party)
  • This refers to after the training center incident where you also receive your first salary.

Magical Lamp (Given by Cid) (starts diabolos GF fight)
  • Your first SeeD mission is given by Cid just south of the directory, south two screens. Talk to him again to receive this item. You cannot challenge him to a card battle here.

Seifer Card (3F)
  • After Cid gives your mission, go north and save. Then challenge Cid in his office using the elevator to the third floor.


Balamb
Trigger Kiros Card
  • Lose MiniMog Card against Queen of Cards so his father creates a new one (Kiros card), she should head to Dollet not Galbadia , if she goes to Galbadia reload your save.


Pet Pals Vol.1 (Unmissable)
  • After boarding the train to Timber for your first assignment, you'll be given the magazine upon interacting with Zell inside of your room.

Note: Laguna gets squall experience so make sure to kill him before winning a battle.

Forest Owls Mission
Angelo Card (Watts)
  • Watts has the card, and there's also a save screen to the north that you can use to prevent card losses.


Pet Pals Vol.2
  • After the mission is explained with how the trains work, return to Rinoa's room and the bed will be reclined into a couch with a magazine on it. Take the magazine.

Timber
Pet Pals Vol.3 and 4 (Pet shop)
  • Buy them for 1000 each in Pet shop


Girl Next Door Magazine
  • Side Quest Related
  • Timber Maniacs lobby

Timber Maniacs (Newsroom)
  • Backroom of Timber Maniacs building


Timber Maniacs (Hotel - stay a night)
  • Must be done after the event at the broadcast tower. The hotel is restricted until then.

Overworld - Beach
White Wind Blue Magic - Adamantoise
  • After the train ride, head to the coast so you can fight some Adamantoise for the White Wind (Whisper) blue magic for Quistis.
  • The easiest way is to train Diablos to learn 'Mug' command which requires 200 AP. If you do not have Mug, then you can keep killing Adamantoise regardless and hope they drop it until you do learn Mug. Whichever comes first.


Disc 1 - Part 2
Dollet
  • Location: Follow the train passed East Academy, then follow the road to the cliffside coast.

Timber Maniacs - Guest Room (Inn)

Timber Maniacs (Pub)
  • When playing this man, there's a good chance that you will want to abolish the Random rule before it can spread. It's best to save at the hotel and challenge the guy at the pub beating him and a rule will be abolished. If Random isn't abolished, reload and try again.

Pub owner secret room
  • Just play a card game against him and win


Siren Card [Pub owner secret room]
  • If you didn't abolish Random rule, then you may have trouble winning this card game for the Siren card. He generally ends up using Siren card first at the top left.


Occult Fan II [Pub owner secret room]
  • Examine the closest magazine stack. You may have to leave the room and come back in.

Centra - Excavation site
All your actions here will have consequences in 3rd disc revisit.

Old Key
  • First location is when you take the right path at the fork and find this on the ground.

  • Second location is taking the left fork and right after climbing down the ladder.

    This will get you access to Ultima magic near endgame.

Power Generator access (Quistis's limit) (open right hatch)
  • On your first visit to the hatches, examine the bottom right of the middle hatch to setup a trap. When you walk away, you end up seeing an enemy soldier run over the trap and fall. This is on the right fork.
  • When going through the left fork, you end up on the very left side. After examining the loose hatch and trying to setup a trap, the party reminds you that if you do the left one, you WILL NOT be able to get back safely as you're in between two holes. No action is taken.
  • Finally, you'll go back around to the right fork and should try to setup a trap on the right hatch. The hatch is apparently too tight to do so. This is all you need.

Note: Press the red switch (opens right hatch) then the blue one to get access to Combat King 005 magazine in late game.
  • The red switch will block the cross path that leads to the right side of the hatches. Simultaneously, the rumble will loosen the right hatch and effectively opening it.
  • The blue switch moves to closer boulder down and into a hole.

The Tomb of the Unknown King
  • Location: Northeast of Deling City

Brothers GF + Minotaur and Sacred Cards (automatically granted after completing this dungeon)
  • You need to essentially visit each cardinal direction of the map except for South as that is the exit. On the eastern end, you fight a pre-battle with Sacred. On the northern end, you can flood the dungeon by letting water through. There's a draw point here. On the western end, you mess with the gears on the left to presumably lower the draw bridge.
  • Once you've done all three parts, exit through the south, then enter again and head straight to the middle for the boss fight.
  • HINT: To go from south to east to north to west to south again, simply take the right route every single time it's a 4 way crossroad.

Dollet - Queen of Cards sidequest

Lose your recently won Sacred Card against Queen of Cards so his father creates a new one (Irvine), her next stop should be Balamb , otherwise reload your save.


Note: you can win Sacred card back from his son after losing it (Minimog as well).

Deling City

Kiros Card (man in black ,across the street from the Junk Shop)


Timber Maniacs (Hotel - stay a night)


The Assassination

Weapons Mon May (west from manhole)


Carbuncle GF (Draw it from Iguion Boss)


Tunnels are a good spot to learn Electrocute limit for Quistis


Mug Creeps for Coral Fragment (Electrocute blue magic)
Disc 2 - Part 1
Galbadia D-District Prison
Combat King 001 Magazine
  • Located on the first floor of the prison, Level 1. It is inside the right cell. If missed, it can be purchased at the Esthar Bookstore.

GIM52A Boss
  • Either mug this boss, or killing enough that they drop it as a battle reward. The item you're looking for is 'Missile' which teaches Quistis a Blue Magic.


Deling City - Caraway's Mansion
  • Lose Ifrit card against Caraway


  • Then win Rinoa's card from him


  • If you lose Ifrit card here and do not recover it from General Caraway, you can retrieve it at any time in Fishermans Horizon from Martine who sits on the platform with the mayor's house. One screen to the right from the entrance. You can't leave the room if you want to win it back from Caraway.

  • Abolish random rule
Abolish Random:
Conditions: Unable to spread Open and Same Wall
  • Hardreset
  • Load save where you want to abolish the rule
  • Challenge, select no for a total of 4 times
  • Challenge, select yes, Quit without playing
  • Random should be abolished
  • If not, you can try saving at the hotel, hard reset, then load the hotel save. Leave the hotel, go back in and challenge and refuse twice, then challenge, accept and quit.

    Source: http://www.gamefaqs.com/boards/197343-/61703021

Missile Base
Weapons Mon Jun (dropped by BGH251F2)
  • Boss Reward; not missable

Balamb Garden
CC Group Quest
  • To start this sidequest you must win 15 triple triad games in Balamb garden (Cafeteria, Library or Classroom 2F doesn't count) once you've done so , you can start playing against the members of CC group. defeat them in order.
  • If you've already robbed that little kid who runs around in circles, then you should be well over 15 wins in Balamb Garden.
  • Do not forget to play them for any cards that you don't own for the Collector achievement.

Jack (Main Hall)
  • This is the first of the CC Group opponents.


Card Magician Joker
  • Head into the Training Center, take the right path and go passed the docks. Save at this save point.
  • Go right, if the Joker isn't on the dock, go left and right. Repeat until he spawns. Beat him, and if you didn't get the Leviathan card, challenge him and repeat until he does.


Card Knight Club
  • Save in your dormitory, then head one screen down. Knight will come from the left and then right. So if he doesn't spawn, simply go left one screen and go back to the right. Repeat until he spawns.

Card Princess Diamond
  • Diamond is actually two girls, known as the Diamond Duo. They are the pair of girls who talk just under the Garden directory. They approach it from the bottom path. Leave/enter the screen until they spawn. Closest save is the dormitory.

Norg Boss
  • Whenever you've finished beating the first four members of the CC Group, go ahead and go to B1 with the elevator.
  • Draw Leviathan GF from NORG's body, not his pod.
  • Less importantly, there's a bio draw point where he dies.


Card Prince Spade
  • By defeating NORG, you'll gain access to 2F. Do so and on the bridge you'll find your next challenger, Spade. If you recall, this is the guy who gave you 7 cards at the beginning of the game.

That's all related to CC group you can do for now.

Fisherman's Horizon

Occult Fan III (do this as soon as you enter Fisherman's Horizon)
  • Upon entering Fishman's Horizon, go to the right two screens and you'll see a giant cylindrical structure. There is a long ladder on the side of that structure that you can take down. Take it down, then take two ladders up to the left. You'll find the Master Fisherman. Exhaust his dialogue.

Timber Maniacs
  • After talking to the Master Fisherman, he mentions about his pupil. If you head into town, you'll see a tiny kid on a boat near the shopkeeper. Exhaust the dialogue with the kid until he's able to get a line in the water.
  • Now progress the main storyline until you liberate Fisherman Horizon from Galbadia at the end of the rails near Timber Maniacs.
  • Now return to the little kid and talk to him who finally casts a line.
  • Return to the Master Fisherman, and he'll leave his perch and head to the inn.
  • Go to the inn where the Master Fisherman gives backstory regarding Fisherman's Horizon. After he leaves, examine the magazine on the ground.

Timber Maniacs
  • From the main road, if you head north to the next area where the rails starts to ramp up, take the door to the right to meet the Grease Monkey (with a soldier complaining).


Quetzalcotl Card (Mayor Dobe)

Irvine Card (Flo)
  • You can challenge Flo after the commotion that occurs at Fisherman's Horizon.
  • You must have lost the Sacred card to Queen of Cards (presumably at Dollet)


Ifrit Card (Martine)
  • If you've lost your Ifrit card to General Caraway, then Martine will have the Ifrit card for you to win back.


SAM08G
  • Mug the SAM08G for Running Fire item for Quistis' blue magic.

Disc 2 - Part 2
Balamb Garden
Card Queen Heart (Garden's bridge)
  • Once the Garden is fixed, you'll be able to continue and finish this side-quest and achievement. Head to the bridge, and challenge Xu to a card game who is Queen Heart.
  • Also make sure you get the Carbuncle card from her. She can be challenged anytime here.

Card Master King
  • After defeating Xu, talk to Dr. Kadowaki in the infirmary. She will give some information regarding the King and how she lost her position 4 years ago to a girl. Now save your game in your dormitory.
  • Examine your bed. If you're in a party, you can tell them to give you some space. Then if you examine the bed again, you can rest.
  • Rest until Quistis appears revealing herself to be the King.
  • Make sure to get the Gilgamesh card from her. Quistis mentions that future challenges can be done on the bridge.


Shumi Village
  • Location: Located on the northern continent

Timber Maniacs
  • If you head all the way to the left of the village, you'll find two houses. One with a statue of Laguna and a Firaga draw point in the left house. The magazine is in the right house.

Centra Ruins
  • Location: Located on the southern continent, Centra
  • Brief walkthrough: Take stairs twice until you reach the ruins. Go inside, take the elevator block up.
  • Use the left ladder, go in and examine the control panel. Go out, down. Examine the blue orb at the altar at the bottom of the ladder. Take the newly appeared stairs to the right.
  • Take stairs all the way up, take ladder immediately at the top of the stairs. Examine statue and take the left eye.
  • Go down ladder, go up stairs to the right. Climb up the ladder to the left and examine statue. Put in the left eye, statue gives code. Remember code: mine was 60696.
  • Take both eyes, go back to the first statue, put in both eyes.
  • Statue wants a code, put in your code. Top to bottom, I put 6-0-6-9-6. Hit cancel to CONFIRM.
  • Door opens under, boss fight. Reward is the Odin card. Exit the ruins.

Tonberry GF
  • Due to the 20 minute time limit, you'll want to exit and re-enter to reset the timer. Kill a total of 20 tonberries, and the Tonberry King will show up. Defeat him, and receive the Tonberry GF.

Balamb
Raijin - Combat King 002
  • It's a battle reward; not missable

Fujin and Raijin
  • Make sure to draw Pandemona from Fujin

Pandemona Card
  • Hotel owner is on the ramp right outside of the hotel


Fat Chocobo Card
  • With the Chicobo Card, lose it to the Queen of Cards who SHOULD be at Balamb. If she's not at Balamb, then just make sure she's either in Dollet, or ends up in Dollet.
  • If she's in Balamb, then make sure she goes to Dollet.


  • Card can be recovered from her son in Dollet.

Chocobo Forest Sidequest
  • The objective of each forest is to end up with one chicobo to show up and then interact with it to bring out the mama chocobo.
  • After that, you'll have to find the treasure for the mama chocobo to dig at for stones.

Beginner's Forest
  • Use whistle; just find a spot where only one chicobo shows up.
  • Treasure: Near the top right corner.


Basics Snowfield
  • Use the whistle until all three chicobo show up, then stand on the right side near one of the two chicobo and use the whistle so both of them disappear leaving just one left. Stand just bottom right of the bottom right one should do it.
  • Treasure: Midleft section, on the slant.

Roaming Forest
  • There are already two chicobos standing on the ground. Stand in between the kid and the left chicobo and use the whistle to send them up. Then go all the way near the entrance and you'll see a fallen branch on the left side. Use the whistle there.
  • Treasure: Very top middle.


Forest of Solitude
  • Recommended to use the sonar, as this area is VERY sensitive. Stand on the left side of the boy where Squall's legs are just pixels to the left of the boy's shoulder. Squall's feet should be just above his hand as well. Whistle it in.
  • Treasure: Challenge the boy to a card fight and tell him to move. The treasure is right under him. Use Sonar to check location, BUT you cannot switch to the whistle for some reason, so you may have to guess the area.

Forest of Fun
  • Stand at a point where you're just under the same height as the boy and standing over to the right where the top of the incline touches the top of the lower area. The ivy ends here. Whistle this for three chicobos.
  • Next, maintain the same height on the map, but walk to the left so you're in between the set of chicobos and the boy. Stand 3/4 away from the boy, and 1/4 away from the chicobos. Whistle here to bring in a 4th chicobo.
  • Now stand 2 steps to the right of the far chicobo and whistle for a 5th chicobo to fall.
  • Lastly, stand a few steps under the chicobo that just fell. Squall's knees should be aligned with the boy's knees.
  • Treasure: Far right in the back. Squall should appear to be in between two foreground trees.

Enclosed Forest
  • First Whistle: Stand in the clearing, but stand above the boy. Whistle in two chicobos.
  • Second Whistle: Stand on the tile JUST above the boy and slightly to the right. This brings in a chicobo on the left and the right jumps back up.
  • Third Whistle: Stand right where the chicobo that just jumped up was at to bring him back.
  • Fourth Whistle: Stand at the top right next to the rock. One chicobo will join.
  • Fifth Whistle: The three chicobos closest on the right form a triangle, stand in the very middle of this triangle and whistle the last one in.
  • Treasure: Very far right at the top near the rock.

Chocobo Sanctuary (Chicobo Card)
  • To reach this forest, you'll have to return to the Roaming Forest (3rd forest). Mount the chocobo there and head east onto the coast and cross the shallow water over to the next continent. Then head north and you'll find a hidden chicobo forest inside of the forest.

Disc 2 - Part 3
Balamb Garden - Chubby Chocobo Card
  • Guy sitting on the bench next to the Library.


Trabia Garden
Weapons Mon Aug
  • At the entrance, where you should see a draw point and a broken fountain.

Timber Maniacs (Graveyard)
  • The magazine is on the ground just to the left of the draw point. It's very tiny, but visible.

Selphie Card
  • After the very informative cutscene, challenge her friend for the card. You'll know what I mean.
  • This might also be your first encounter with the Plus rule, so I'll explain.
  • It runs on the same principles of 'Same' where you place two cards, and then place a card adjacent to BOTH cards. In the same rule, if the card just placed has two adjacent cards with EQUAL numbers on each side, so 4 and 4 on the left, then say 6 and 6 at the top, then you win both cards.
  • In the 'Plus' variation, if the SUM of those sides are equal, then you win both cards. Example: If you had 2 and 5 on the left, then 3 and 4 on the top, the sum of those cards is 7 on BOTH sides and thus you win both cards.


Galbadia Garden Revisited
  • Location: Centra Continent, southwest region

Cerberus GF
  • After infiltrating and getting various card keys in Galbadia's Garden, you'll meet Cerberus straight center of a room. Save at the bottom right if you want.
  • You can fight him later, or now. He appears later again.
  • Battle Rewards: Cerberus GF and Cerberus Card


Alexander GF
  • After the first solo fight against Seifer, you'll be up against Edea AND Seifer. You'll have to defeat Seifer first.
  • Draw Alexander from Edea after Seifer falls.
Disc 3 - Part 1
Balamb Garden
Weapons Mon Jul
  • Located in the Training Center, take the left path

Edea's House
Timber Maniacs (near doorway)
  • Upon entering the doorway, it sits on the ground to your right

Edea Card
  • Challenge Edea for the card. She uses Centra rules.

White Seed Ship
Timber Maniacs
  • After entering the ship, head over to the right and you'll have a cutscene. Follow Zone up the stairs.
  • This SHOULD be your final Timber Maniacs magazine thus unlocking the achievement.

Shiva Card
  • Talk to Zone who pilots the ship. If you have the Girl Next Door magazine, offer it to him for free to get the Shiva card.
  • If you don't have the magazine, it's on a stack of magazines in the Timber Maniacs building in Timber.


Lunatic Pandora Laboratory - Laguna
Squall Level 7
  • You cannot skip this battle and MUST kill him using Laguna which results in Squall earning experience points. If you've avoided earning 426xp on Squall the entire time, you've got nothing to worry about.
  • If you've earned a bit more, you can use Tonberry's LV Down to lower the guard's level and effectively lowering the exp he gives.


Weapons Mon 1st
  • The magazine won't be here while Dr. Odine is in the room, so exit on the bottom of the screen, then return when you can move again.

Esthar
Ward Card
  • After returning to Squall's body, you'll be hit with a cutscene and meet up with Dr. Odine. Challenge him and beat him for the Ward card.


Occult Fan IV
  • From the palace room where you left Rinoa, exit down, then exit right. Take the elevator out of the palace. Go down, there's a draw point for blizzard. Go left twice, down once, left again. Talk to the man on the right.

  • Now go back to the palace. Up three times, right, up, and take the elevator. Now head immediately to the left and you'll see the Secretary right outside of a doorway. Talk to him.

  • Neat!

Combat King 004 - Pre-req
  • From the elevator, go down, left twice, then right twice. You'll end up on an overhead bridge with a soldier looking over. If you talk to him, he will say "Oh yeah. That's right."
  • Carry on.
  • Before


  • After (Whenever the Lunatic Pandora arrives, you can talk to him then)


Shops
  • Note: Visit every shop to make them appear in Disc 4 , also make sure to unlock Esthar Shop after visiting them all.

Esthar Pet Shop
  • Buy Pet Pals Vol.5 & Pet Pals Vol.6 for Rinoa's Limits

Esthar Book Store
  • If you've followed the guide thus far, you can go ahead and buy both Combat King 004 and Combat King 005 and you will be done with magazine collecting.
  • Else if you're too cheap, wait for them later in this guide.


Lunatic Pandora
Power Generator
  • This is one of Quistis' blue magic limit for Ray-Bomb

  • Take elevator #3 on the far right. Then go to the bottom right down some stairs. Go down the ladder, then head left. Inside the right room is the power generator. (Must've been unlocked in Laguna's visit here)

Combat King 005
  • This SHOULD be your final magazine. Else, check what you're missing.
  • From the Power Generator, simply head left and it'll be on the ground. If you can't find it, then you messed up this part when Laguna was here with the traps and detonator. Buy it from the bookstore instead.

Lunar Base
Abolishing Random on Lunar Base
  • Make sure to get to the point after you spot monsters on the moon on the monitor.
  • Save in the medical room.
  • Turn off the game. [Hard Reset]
  • Load the game
  • Go up one screen, challenge the staff member, and say No 4 times.
  • Challenge him, and accept, then select Quit.
  • Challenge him 4 times and say No 4 times.
  • Finally, challenge him and accept and quit 4 times.

Alexander Card
  • Piet will be in the command room at the very top. Challenge him for the Alexander Card. You'll need to lose this later.


Laguna Card
  • Note: Make sure to play cards BEFORE talking to her. Talking to her progresses the story.


Cactuar GF
  • Location: It's on an eastern island of Centra's continent. You will see the Jumbo Cactuar on the world map itself as a green guy. It's on the tiny island and will randomly pop up in the desert.


Doomtrain GF
Solomon Ring
  • It's at the foot of the large statue at Tears' Point


6x Remedy+
  • Buy 60 remedies from any shop, then use MED Lv Up to upgrade them to Remedy+ (10 remedy per remedy+)

6x Steel Pipe
  • Mugged from Wendigo monsters (Forest near Dollet)
  • You can also card mod the Elastoid card into 1x steel pipe each


6x Malboro Tentacle
  • Found on Island Closest to Hell. Can be mugged or hope for a battle reward.
  • Alternatively, you can card mod 4 malboro cards into 1 malboro tentacle (24 for 6x, 28 including Quistis' blue magic)
  • Island Closest to Hell is the far left most island. Enemies have 50k+ health.
  • Use degenerator to quickly defeat them or just escape. (I also recommend getting one extra tentacle for Quistis's bad breath limit)

Disc 3 - Part 2
Deep Sea Research Center
  • Location:

Bahamut Boss (GF and Card)
  • Do not move when the core starts to glow. Do not start moving until the marquees have faded at least half way.
  • Options we must choose:
  • It's not our will to fight
  • Never
  • Hidden bottom option


Quistis Limits: LV? Death, Shockwave Pulsar, and Mighty Guard
  • After the battle, go back to the Ragnarok and enter the conference room, also talk with everyone in here. Now go back to the Deep Sea Research Center, there should be a path open to continue...
  • Before you clear out Ultima Weapon, you'll want to do a little farming first. On the first panel, pick 4 units to spend. This will only need to be done ONCE.
  • Now after that, with Zell in your party, pick 1 on the rest of the levels. When you get to the bottom, you may notice that Zell wants to punch the door. Let him.

  • Move on and now you can farm for two things: Barrier from Behemoth and Cursed Spikes from Tri-Face.
  • Tri-Face has a drop chance, but will 100% give you curse spikes if you mug him. So mugging is the best option. Then it's also an uncommon reward from the imps. You will need a total of 101 Curse Spikes. 1 for Quistis' limit 'LV? Death', then 100 to convert into 1 dark matter for another Quistis limit 'Shockwave Pulsar'.

  • Side Note: In older versions of the game, in order to refine 1 Dark Matter, your Siren needed to be level 100. This does not seem to be the case for this PC Release. If you can't though, then this may be the issue and you'll have to get Siren to 100.
  • As for Behemoth, simply mug him for the 'Barrier' item so you can learn 'Mighty Guard'. It's also available as a rare battle reward.

Ultima Weapon
  • If you followed this guide, then the first room is already done using 4 and cannot be changed no matter what. So head to floor 2 after resetting the pressures.
  • Pick 2 units for room 2, then 1 unit for room 1. Examine the panel in room 3, and then go through the door labeled by a big '0'.

  • Examine the panel to gain an additional 7 units.

  • Do 1 unit for the next two rooms until you take a lift down to the final door. This will always require '4' to open, so do so. This will leave you with 10 RSP left.
  • Follow the linear path to the very end until you see a machine. Ultima Weapon may prove to be difficult as he has a OHKO attack, so I do recommend that you equip the Move-Find ability onto someone as there is a save point to the left of the machine.

  • Draw 'Eden' from Ultima. This is actually not missable as Eden can be obtained later in the game.

Dollet - Queen of Cards quest
  • Per usual, lose the Alexander card to Queen of Cards. Technically she's allowed to move where she wants as she did start in Dollet. But I'm more comfortable with Balamb, but pick your poison.


  • Also per usual, the Alexander card can be obtained from her son.

Timber
Doomtrain Card
  • After losing the Alexander card, the Doomtrain card will be created. Challenge the Pub Owner to the right for it.


Deling City - Queen of Cards quest
  • Finally, the last time you'll ever have to lose a card. Lose your newly obtained Doomtrain card to her. She's wherever you left her (Balamb/Galbadia). Just make sure that she returns to Dollet to give her father the card.

  • The Doomtrain card can be obtained from her son after you lose it.

Esthar
Phoenix Card
  • Head to the palace, you may want to save if you have some weird rules up for Esthar. Challenge the President's Aide for the Phoenix Card.

Disc 3 - Part 3
Obel Lake Quest
  • There is a chance that you've already started this side-quest, but as this is the first mention of it in this guide, it'll be explained in full.
  • Another note is, THIS CANNOT BE DONE ON DISC 4.

Step 1: Finding the Shadow
  • Head to Obel Lake. On the continent near East Academy stop and between there and Timber, you'll find a small lake with a rather sizable peninsula. This is Obel Lake. Stand on the peninsula and interact around there until you get an option to 'Try humming' and 'Throw a rock'.
  • Pick 'Try humming' to summon the shadow. After that, you'll get another option, pick 'Try humming again' and you'll finally encounter your shadow.
  • When prompted, pick 'What is it?'
  • Your next step is to find Mr. Monkey

Step 2: Finding Mr. Monkey
  • Head to Dollet, then go to the closest forest. Use the action key until you encounter Mr. Monkey giving the option to 'Throw a Rock'. Throw a rock and return to Obel Lake.
  • Once back at the peninsula, summon the shadow by picking 'Try Humming' and you will share the whereabouts of Mr. Monkey.
  • After the dialogues, pick 'Throw a rock' until it says 'the rock skipped many many times'.
  • Then after that, continue talking to the shadow for hints that will lead you to the four clues. Simply keep talking to the shadow until he repeats himself.

Step 3: The Four Clues
  • Clue #1: Head back to the forest where you found Mr. Monkey and throw rocks at him until he throws one back. It'll be a man-made stone with carvings on it: U R H A E O
  • Clue #2: Head to the rails that are connected to Fisherman's Horizon, then head west. You will see a peninsula just north of where the rails connect to the mainland. Examine that peninsula for the man-made rock: R E A I D R
  • Clue #3: In between Galbadia Garden and the D-District Prison, there should be a railway that runs near some cliffs and over a river that has a waterfall coming out of the cliff. Land the Ragnarok on top of the cliff with the waterfall (you can check menu to see that you're in a place called 'Monterosa Plateau'. Use the action key to get a notice about a bird warming up some eggs to trigger a scripted battle. Finish the battle to retrieve the last clue: E A S N P D
  • Clue #4: Head over to Balamb and run around on the beach using the action command. Keep finding rocks until you find one similar to the one thrown by Mr. Monkey: S T S L R M

Step 4: Three Stars
  • Head to Esthar, then head north. You'll pass some plateaus. Then above that, you'll find some dirt plains before running into a set of mountains. Run around the plain examining and you'll find some interactions: blue rock, white rock, black rock, and red rock.
  • The blue rock provides no actual hints aside from the fact that every other rock is lying as they are the 'Liar Rocks'
  • The white rock says whatever it wants.
  • The black rock repeats the last line.
  • The red rock helps you find the 'Three Stars' that you're looking for by lying. It will tell you a cardinal direction, but the treasure is in the opposite
  • In turn, simply point your map to the north. Examine rocks until you find a red one. If the red says the treasure is to the east, go west. If it says west, go east. If north, go south. If south, go north. Ignore all other rocks.

Step 5: The Final Clue
  • Return to Obel Lake and talk to the shadow. The shadow gives you a hint that you should take some 'time off' at Eldbeak Peninsula. Head there.
  • Eldbeak Peninsula is located on the southwest corner of the Trabia Continent. (It's northeast of Obel Lake.) Examine the very tip of the peninsula for the clue: "TRETIMEASUREATMINOFFDEISLE"
  • Combine that with the hint that the shadow gave you, simply remove the words "time" and "off from the clue to give you: "TREASUREATMINDEISLE" or 'Treasure at Minde Isle'

Step 6: The Treasure
  • Now for the finale, head to Minde Isle. It's a small island south-southwest of Esthar and northeast of the Centra continent where both continents meet. You can check your menu to see if you're in the right area.
  • Now, you don't get any hints as to which part of the island it's on, but it's tiny so spam the action key. The only hint you do get is, it is NOT on the edges of the island. So park your Ragnarok on the edges so it's not in your way.
  • You'll get a dialogue when you've found the reward as well as the achievement: Luck-J

PuPu's Quest
  • This questline has two purposes: the PuPu card and the UFO achievement
  • Do this as soon as you get the airship, Ragnarok.
  • UFO encounters are battle encounters; however, they ignore the fact that you use ENC-NONE. So you're welcome to use ENC-NONE to hunt for these encounters.

UFO #1: Mandy Beach
  • This is located on the beach to the east of Timber.


UFO #2: Kashkabald Desert
  • This is located in the desert on Centra on the east side.


UFO #3: Winhill Bluffs
  • This is located near the cliffs at Winhill. Being on the road is good enough.


UFO #4: Heath Peninsula
  • This is located east of Trabia Garden on a small island. (Ragnarok required)


UFO #5: Chocobo Sanctuary
  • This is located on the cliffs directly north of the Chocobo Sanctuary forest.


  • This is a pre-warning before you head to the next area automatically. HAVE AT LEAST 5 ELIXIR WITH YOU AND 'Item' JUNCTIONED TO A CHARACTER.

PuPu: Balamb Garden (Original)
  • After the aftermath of the fifth UFO, it crashes somewhere. This place is Balamb Garden. DO NOT GO THERE UNLESS YOU HAVE 5 ELIXIR.
  • Elixirs can be bought via Call Shop -> The Esthar Shop!!!
  • Make sure someone has 'Item' junctioned.
  • Once you've got at least 5 elixir and the item action junctioned, head to the original location of Balamb Garden.
  • Give the injured PuPu 5 elixirs to complete the quest.


Ragnarok
Squall Card
  • If you didn't do this back in Esthar when Laguna explained the final plan and moving to Ragnarok, then you can simply go to the meeting room in the airship to challenge him.


Once that's all done, you can proceed with the story and the POINT OF ALMOST NO RETURN. But really, finish everything before moving on.

Lunatic Pandora
Quistis Limit: Homing Laser
  • Boss: Mobile Type 8
  • If you haven't gotten a Laser Cannon which is rather rare, or a 100% mug rate from a Lv30+ Elastoid (very rare), then you'll get here. The mug rate is difficult, but the drop rate is guaranteed almost. So save before then just in case as this is your last chance.
Disc 4
Omega Weapon
  • As Omega Weapon is an optional boss, I'll put this here. After going through the castle and defeated all of Ultimecia's guardians, the last being Tiamat, you should be ready for Omega Weapon.
  • Tips: He has 1,200,000 health points.
  • You can Card Mod the Gilgamesh Card into 10x Holy War to make your party invincible.
  • You can Card Mod the Laguna Card into 100x Hero to make a single character invincible.
  • You can Tool Mod Power Wrists bought from the Esthar Pet Shop into Aura Stones, so you won't need Aura magic to spam limit breaks
  • You can cast Meltdown or Doomtrain in order to inflict Vit 0 on Omega Weapon.
  • Godspeed.

World Map
For a brief moment in Disc 4, you'll be on a giant chain leaving the castle and have some portals. Exiting the portal will give you access to the world map including your airship Ragnarok. For the most part, there isn't much you can do besides shop and play cards.

Queen of Cards
  • She will not be in any of her previous locations; instead, she'll be here. She holds a handful of the quest cards.

Rare Cards
  • If you defeated the CC Group in Balamb Garden, then when you get to Ragnarok on Disc 4, every member will be on the airship giving you access to nearly every single card in the game.

Ending
The End
Quistis' Limits: Blue Magics
Laser Eye: Initially learned.
Ultra Waves: Card-Mod Caterchipillar card
Electrocute: Card-Mod Creeps card
L?Death: Card-Mod Tri-Face card
Degenerator: Card-Mod Gesper card
Aqua Breath: Card-Mod Fastitocalon card
Micro Missiles: Mug from GIM52A
Acid: Card-Mod Gayla card
Gatling Gun: Card-Mod SAM08G card / Mug from SAM08G
Fire Breath: Card-Mod 10x Ruby Dragon cards / Mug from Ruby
Bad Breath: Card-Mod 4x Malboro cards / Mug from Malboro
White Wind: Mug from Adamantoise
Homing Laser: Mug from Elastoid / Kill Mobile Type 8
Mighty Guard: Card-Mod 10x Behemoth cards / Mug from Behemoth
Ray Bomb: Found in Lunatic Pandora (if right panel was opened) / Mug from Blitz (low rate)
Shockwave Pulsar: Refine 100 Curse Spikes (Level 100 Siren skill)


53 Comments
Matryoshka 16 Nov, 2023 @ 5:11pm 
I'm not sure how I managed it, but I accidentally got the "Open" rule removed from Balamb after dueling someone in the dock area. I'm still cleaning up but I've had a few close calls, like with the Quistis groupie. Wondering if I can get that rule back without shelling out the 30,000G.
ZraxXis 6 Aug, 2023 @ 1:06pm 
The kid that runs around in Balamb will follow whatever rules you get in the region. I set the rules to All and then played against him and the rule applied to him.
no name 11 Jul, 2023 @ 11:17am 
Thanks for this. I've quit this game many a time realizing things I missed on my runs. Will be following this. :)
Jon.Topps 21 Apr, 2022 @ 1:56pm 
Another problem, your instructions for abolishing random on the Lunar Base don't work. I believe you might have to do some card steps in Esthar, messing with rules, before going to Lunar Base, in order for your instructions to work. Now I'm stuck with random...
Jon.Topps 25 Mar, 2022 @ 5:45pm 
Lots of things are out of order here, which makes it really hard to follow as a guide.

The Timber hotel cannot be rested in during your entire first stay there.

Your directions to abolish random don't seem to work, and Googling it gives a way better method, and literally every other guide gives that method.

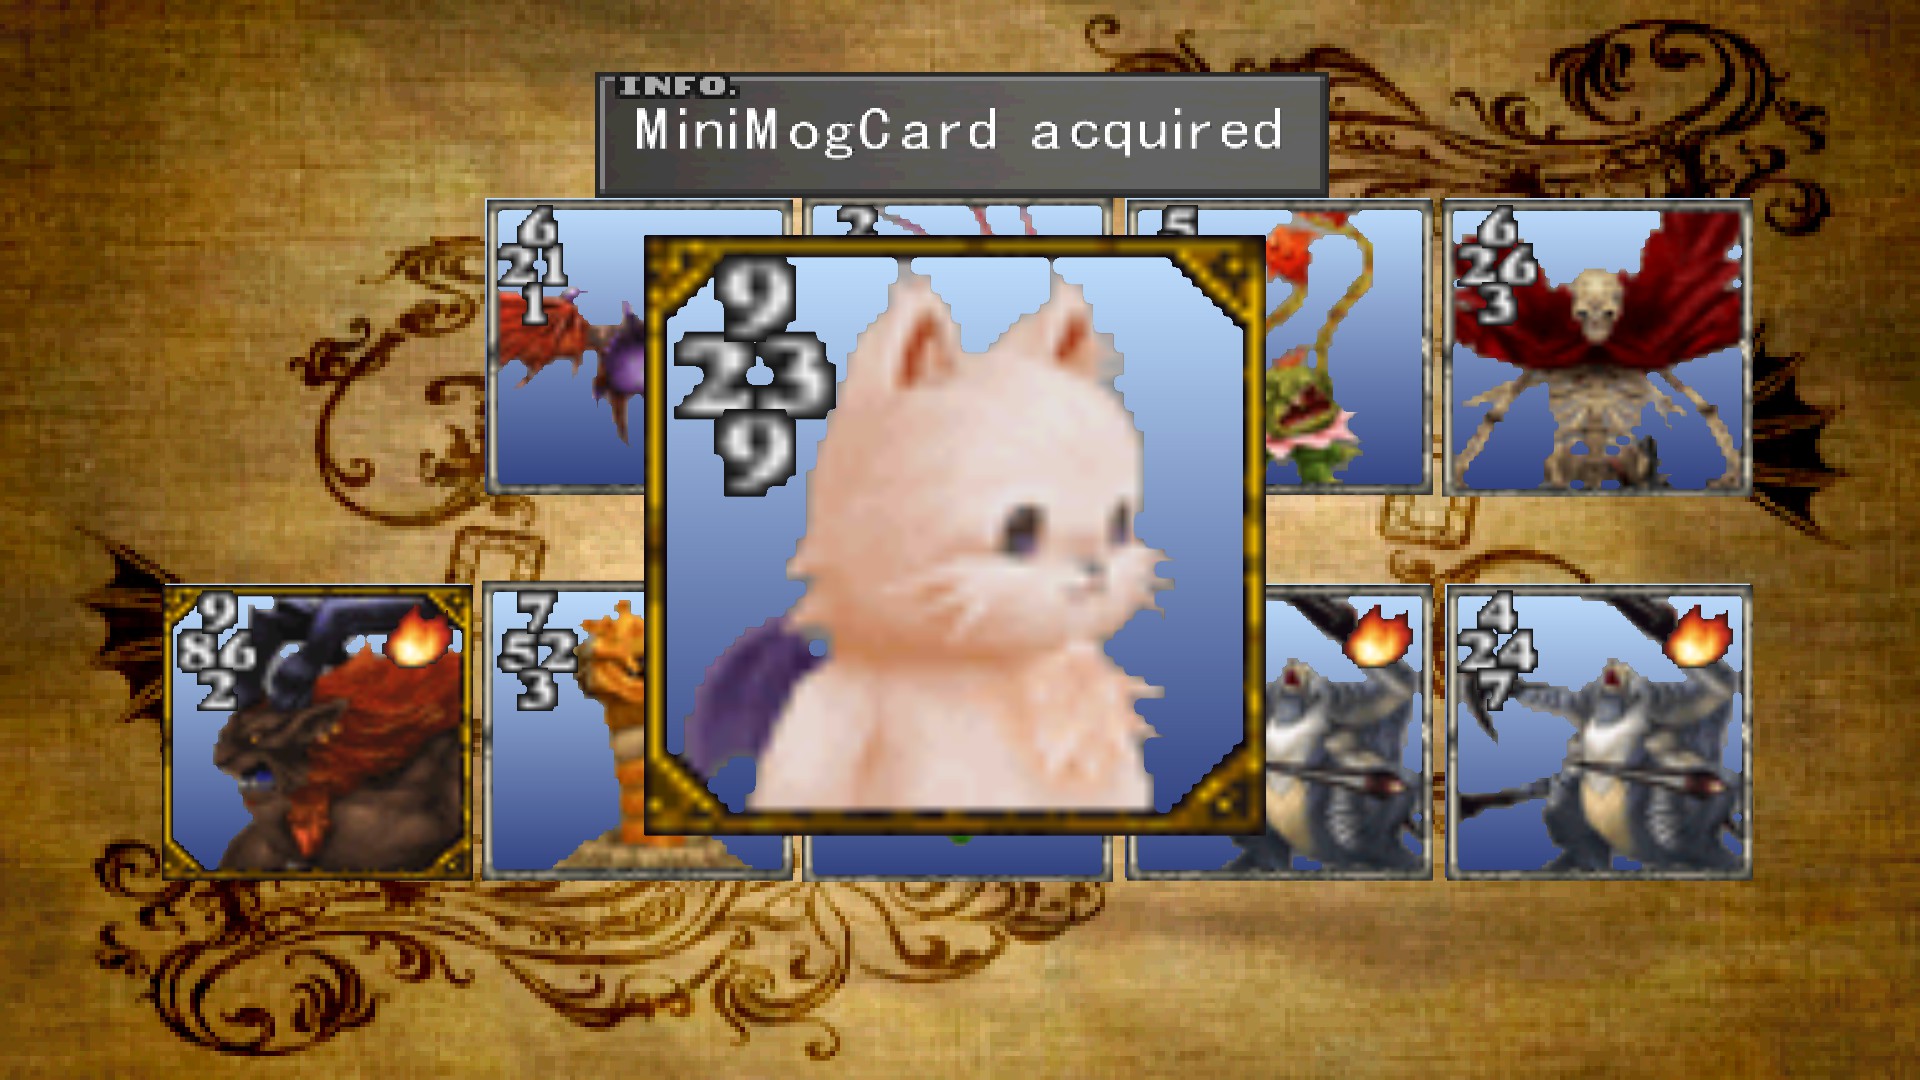
You say to lose the chicobo card before you say how to get it. Is it even possible to get there before that moment in the timeline?

It would be helpful to put story related stuff in-between sections if you're supposed to do something. It's hard to discern whether I should try to get to the location you mention, or continue the story.

I'm scared moving forward that I'm going to mess something up following this.
CaRmAgE 28 Dec, 2021 @ 2:19pm 
ChoShen, paying steam units to open the final door instead of having Zell break it open will disable the fixed encounters. Just go back to the first panel on the top floor to reset the maze, then follow the Ultima Weapon section of the guide; it has the right steam unit amounts to spend on each floor.

Also, about the guide in general, a lot of the missable items can still be obtained from Chocobo World, although the key items are so rare in the item pool that I would only recommend getting them from CW as a last resort. Even then, none of the books are part of the item pool, as far as I can tell, so if you never visit the appropriate shops and/or get the two Occult Fan books that can't be bought (III and IV), there's no back-up plan for getting those.
ChoShen 5 Nov, 2021 @ 10:39am 
I'm sooo screwed! I can't get down to Ultima from the save sphere without Zantetsuken kicking in and ruining it for me, I get soo close and he pops up and gives me a shed ton of experience. I am playing for the contrived finish and I got Odin early (wanting to fully complete every aspect of the game, completely forgetting that he randomly pops up in battles). I have NO-Encounter on but the fixed battles in the deep sea lab are f*&king me up.. Anyone got any suggestions? (please don't put something like "restart" lol.. I'm waay too far for that shit now). I suppose I could kill Squall and then make a run for the hidden save at the bottom...
Ser Skizzbro Swaggins IV 27 Oct, 2021 @ 8:11am 
Concerning the kid with the Minimog card, he doesn't always use trade rule "one". I get the QoC to change Balamb's trade rule to "diff" before beginning my card collecting run at Balamb. The kid usually has "diff" for me, but sometimes will reset it to "one" like the guy at Balamb city's pier does if you challenge him.
SIDEKICK 11 Sep, 2021 @ 8:44pm 
[quote] If you head all the way to the left of the village, you'll find two houses. One with a statue of Laguna and a Firaga draw point in the left house. The magazine is in the right house. [/quote]

i heard Do not read this magazine yet. this should be the last timber maniac copy you read.
in order for Ward to appear in the Ruby Dragon dream.
SoundsInsane 22 Aug, 2021 @ 8:15pm 
Man this guide save me some headaches in finding the cards lol i remember doing all this on the ps1 years back. so many hours trying to collect all the cards was a pain in the butt with a strategy guide or the internet.