Death Skid Marks

Death Skid Marks

133 ratings
THE Death Skid Marks Guide
By Caesar and 2 collaborators
THE (Mostly) Definitve guide to Death Skid Marks in which we'll try to help you understand Death Skid Marks and teach you whatever we understood ourselves.

Mostly everything that is in the base game will be tried to be explained here.

Translated and modified slightly by Caestard.
Original Writers: N.D.Dead+( , Nick_O''Teen
2
2
   
Award
Favorite
Favorited
Unfavorite
The Goal
The Goal is to survive Route 666 (666 KM long), And get to The Concert of Mark Skid's (Your!) dreams. You'll encounter many unfriendly people (not only people) on your way to the concert.
All you have to do for the most part is to survive, Earn money by doing Tasks, Upgrade your car, get some serious firepower and drown everyone in their own blood.

Be warned, The RNGeesus is your one and only God on your way to the Concert.

Game Modes
1) The Spanks - Easy.

Playing at this level unlocks nothing!
Easiest difficulty possible, you won't get any achievements nor any unlocks, exception is your Death Toll, it will be counted. This gamemode is suitable for beginners and training runs. I'm not quite sure but I think it also makes the car have "COMPLETED" sign on it.

2) The Blossomed - Medium Difficulty.

Default difficulty. This is your best choice if you just want to unlock achievements or cars.

3) Sphincter Overdrive - Turbo mode Medium.

Everything becomes faster. bullets, cars, damage, etc. Play this difficulty if you want some fast-paced action.

4) Prolapsed - Hard.

Game becomes more difficult. Meaner enemies, meaner damage and stuff gets more expensive.

5) Turbo Fist - Turbo Mode Hard.

Combine Turbo Mode and Hard difficulty for ball-busting difficulty.

6) Steel Buk kake(sic) - Arcade Mode.

No Shops and no Road Segment picking. Hikers and Items appear randomly for each vehicle kill. Press 1 or 2 or 3 or 4 to give one item to respective Crew Member. 1 gives the item to driver, etc.
Use your mouse scroll to pick who gets what items. Upon getting new items old ones WILL disappear.

7) Cystburst - Arcade Mode Turbo.

Sped up Arcade Mode.

8) 狂潟 - (likely to be Crazy Diarrhea) (in Chinese or Japanese kanji)
- Arcade Mode Hard.


Hard version of the Arcade Mode.
(Thanks to Ryuu-kun for the translation!)

9) (Presumably) Gastrotorrentus - Arcade mode Turbo HARD.

Lord have mercy on your soul. This will get hairy.

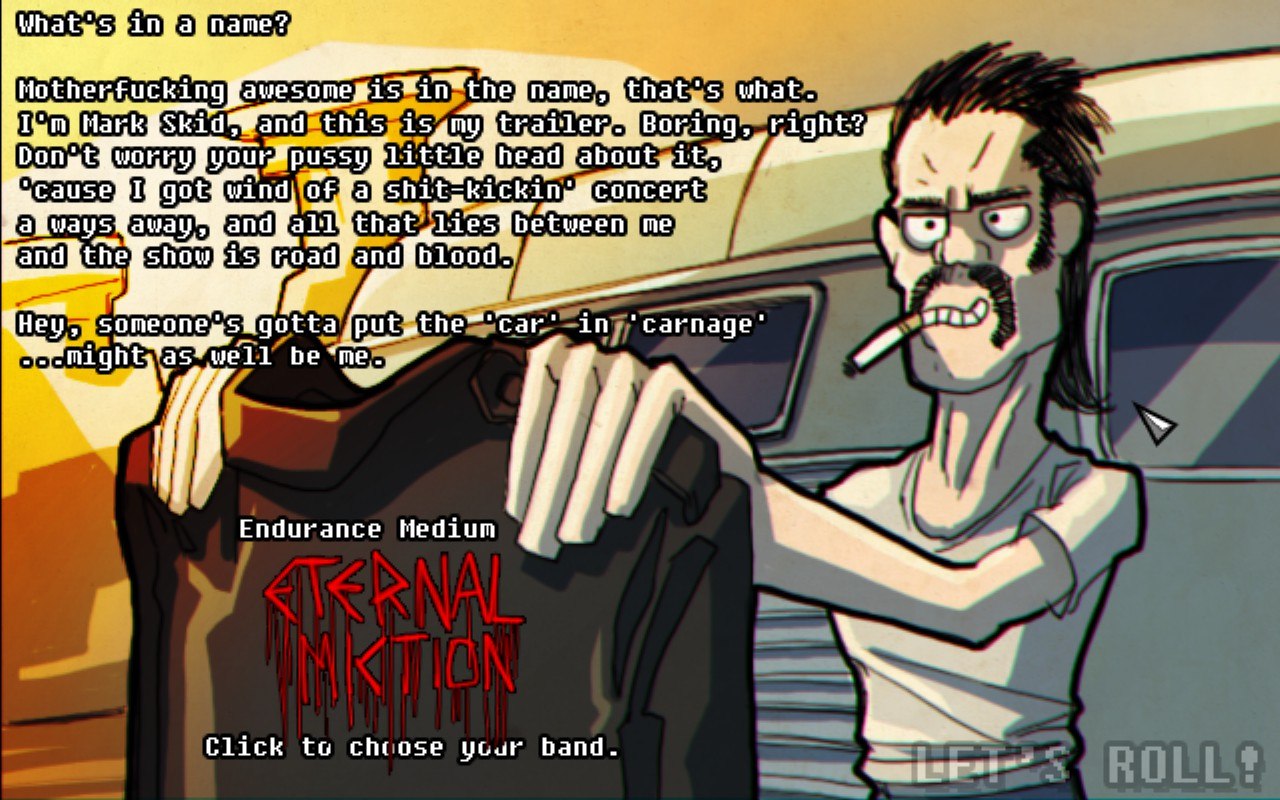
10) Eternal Miction - Edurance Medium.

Bigger Prices, Longer road segments. Generally longer runs.

11) Smegth - Endurance Hard

Hard version of Endurance.

12)Cannibal Lernie - Boss Mode.

Start off with 1500$, Few road segments with normal enemies. Then face all possible bosses, only one Final Boss, though.

13) RanDoom - Random Mode.

If you want everything to be randomised, even your gamemode.

The Cars and Car advices.
A little explanation about unlocking/selecting Cars:
- Most cars unlock after you drive their respective Hikers to the concert and if EVERYONE in your crew had have a ticket.
- Some Cars are unlocked by killing a certain Boss;
- Tanks (except for Mecha-Skid) are unlocked for having a total of 25000 kills combined from all runs, not your Death Toll, mind you.
- Muscle Cars usually are good at ramming;
- Most Trucks and Tanks have bad mobility;
- Cars with Roofs protect their crew as long as roof is not destroyed (You can repair it, though);
- Tanks and Mecha Skid NEVER can get a shop or stickers, you can't upgrade them;
- Tanks are affected by Oil and Holes on the road as much as your regular Standardo gets affected;
- Main problem of 2 seated vehicles is the choice between Wrench and The Medkit.

0) Lurning with Lernie™

MAGICAL ADVENSHURE OF MURK SKID AND LURNIE™ (Tutorial vehicle, stats are identical to those of Standardo XL.)

1) Standardo XL -

Available by default. Your main, well-balanced car. Starts damaged (50%, 75% on Easy).
Reccomended for beginners, includes a mini-tutorial that could be disabled in options. If you just started to play, use the LURNING WITH LERNIE car instead for better tutorial.

2) Acado GT

Car based on the one Hotline Miami's protagonist (Jacket) is driving. Mobile, Low armor, Has an easily destroyable roof which protects your crew from damage. Try to focus on Fender upgrades and avoid Suicide Bombers and RPGs along with other road junk you might stumble on.

3) Bummer

Trade some of your mobility for armor and you'll get this car. Slow as hell but more armor. Focus on Engine, Brakes, Steering upgrades.

4) Muscle 2000 Retro 3

Unlocked by beating Death Saw Groupie. 2 seated. Car has all stats better by default, including Fender. Ramming Tasks are reccomended. Choice between Wrench and Medkit awaits.

5) Mini Whiner

Get Emo Girl to the concert to unlock this.
Smaller than default car. Agile and has better Fender. Forget about ramming lategame, You won't be able to ram anyone. Prepare to drive around and dodge. You also get a random hiker at the beginning of the game.

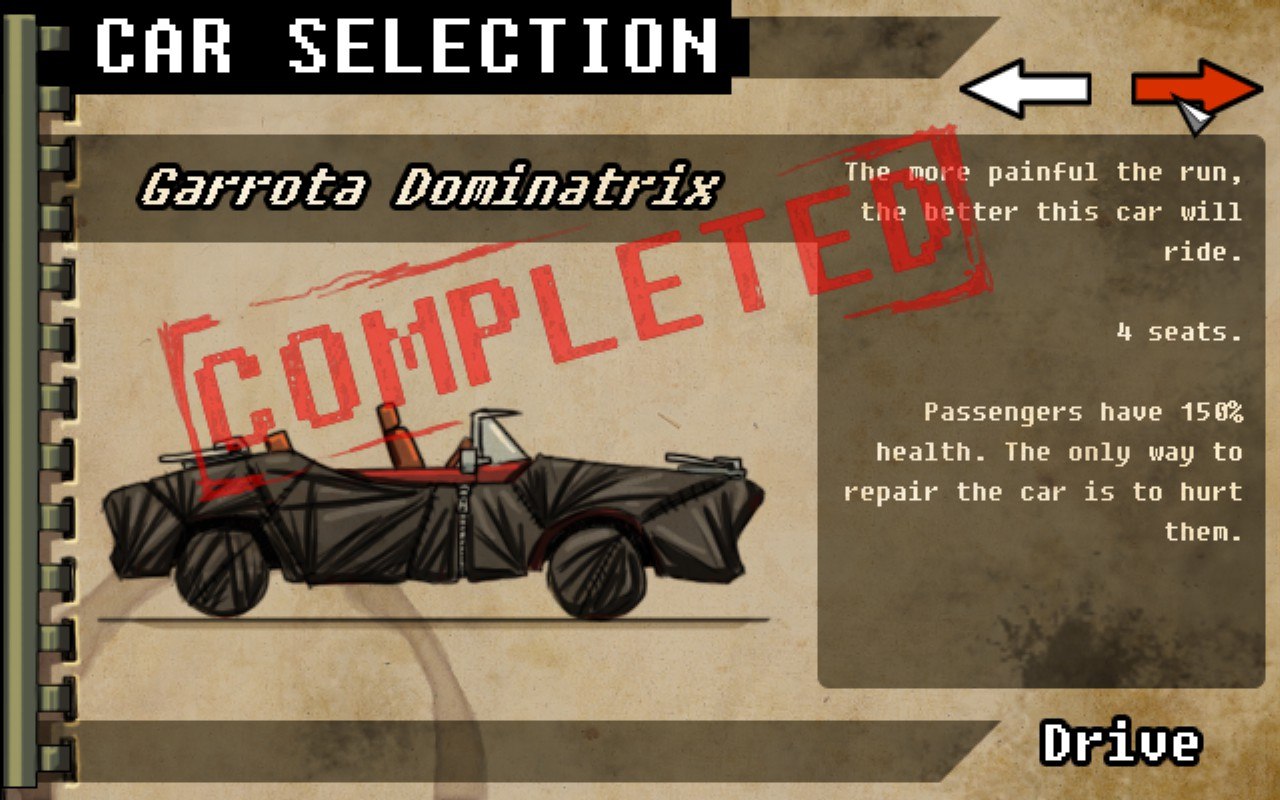
6) Garrota Dominatrix

Get Gimp to the Concert.. You can only repair the car by damaging your passengers. Your passengers have bonus health, however. Medkit and Wrench will never spawn. You can still get food items to heal your crew. Combine this Car and "Trust me, I'm a doctor"(More Passenger Health) Sticker for almost unkillable passengers.

7) Brown Van

Unlocked by bringing Hippie to the concert. Passengers are unkillable, they don't take any damage (except for poison gas). Medkit and Defence-focused drugs are completely unnecessary and you should upgrade offensive stats of your characters instead. Brown Van has arguably the worst Fender in the game so you really, really want to buy some Fender upgrades and please, stay away from the suicide bombers if possible. After prefferably fully upgrading Fender you can focus on mobility. Ramming is reccomended only for early-game opponents.


8) Johnson Harvester


Unlocked by beating Jenny5 Groupie. Low Mobility and average Fender. But Johnson Harvester also offers heavy-damaging rollers on both sides of the vehicle. Tasks related to melee destruction of the vehicles and enemies are reccomended. 3 seats.

9) Anarchy Ride

Unlocked by bringing Punk to the concert. You really, really love random stuff, do you. Tasks switch up randomly each minute or so, You gotta learn to adapt to your tasks and hope for the best. Tasks could be any rank and any type, You could end up with whole tons of money or no money whatsoever. Stats are identical to those of Standardo XL

10) H.O.T.A

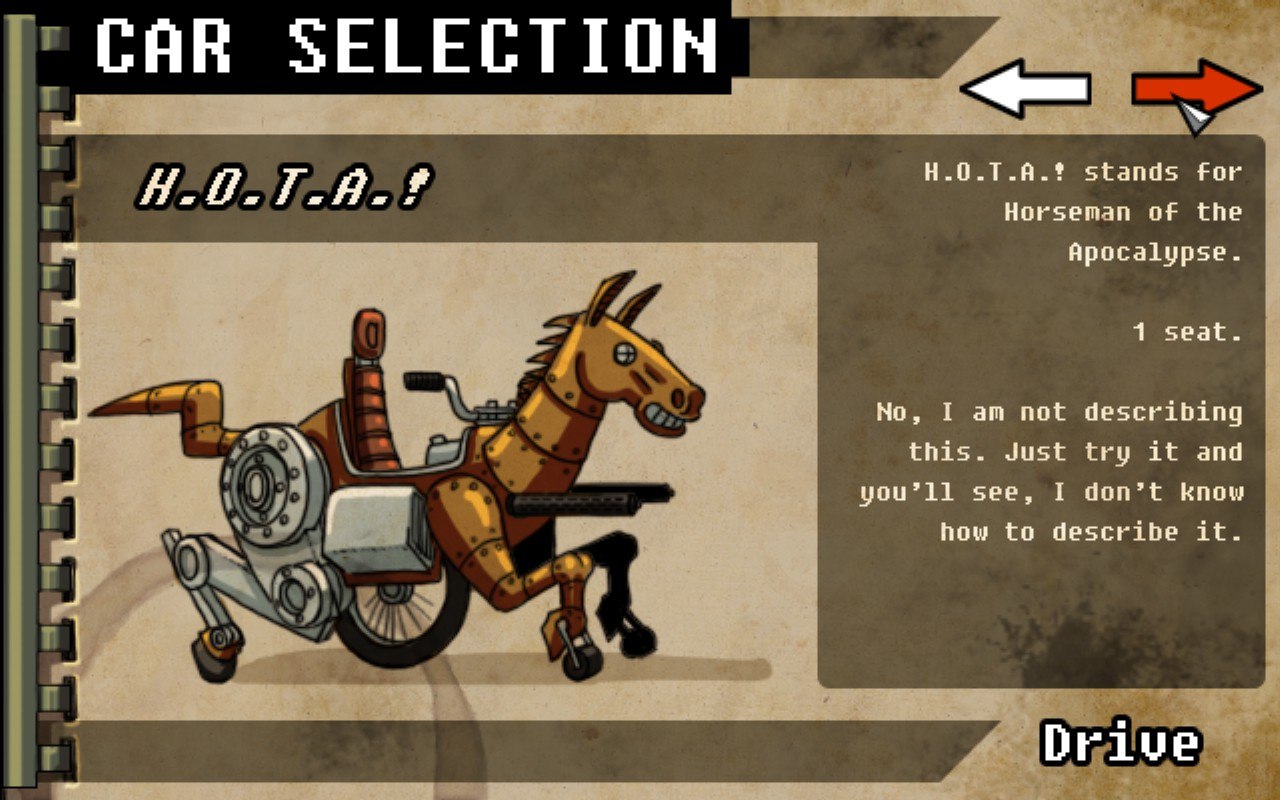
Bring the Horse to the concert. Has double machineguns shooting forward and 2 melee legs behind. Legs have a certain degree of attack. Mobile, decent armor, 1 seat. Don't bother with this car unless you're a complete masochist.

11) Bear Eater

Get Bear to the concert. 2 seated Motorbike with a saw on one side. Has the same issues with ramming as Mini Whiner.

12) Grusom Armored Truck

Unlocked by beating Groupie from Outer Space.. Has indestructible rear but all passengers can be damaged, rear passengers can't take over the driver if something goes wrong. Upgrade Brakes/Engine/Steering first, then upgrade Armor.

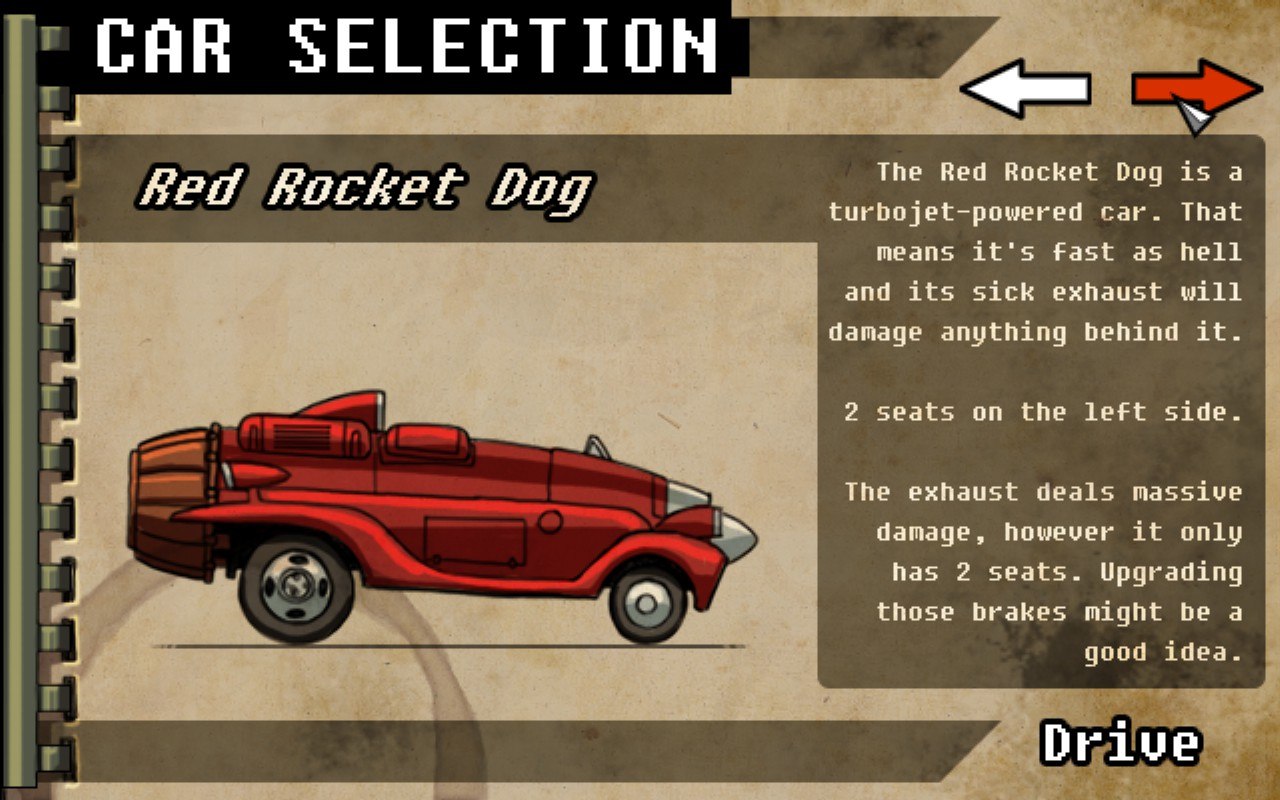
13) Red Rocket Dog

Unlocked by killing Panzergruppies (Tank Groupies). 2 seats on the left side. Has a powerful flaming exhaust which deals massive damage and counts as ranged damage. Choice between Medkit and Wrench is once again a problem. I'd personally reccomend staying on the left side of the road and use wrench to repair the car, right side of the vehicle should soak up most damage. Doesn't mean you shouldn't upgrade crew's defences, though.

The Cars and Car advices part 2.
14) Rocket Turret

Unlocked by achieving Good ending (Mark Skid Alive, Everyone has Tickets).
All Turret cars have 3 seats with 3rd one being the one maining the turret, Turrets are slow to rotate. Turret guy can use only Passive Special items. Rocket Turret has high damage, but slow fire rate.

15) Machine Cannon Turret

Unlocked after achieving No Ticket ending (Mark Skid Alive, No tickets).
Higher rate of fire than Rocket Turret, No recoil from Machine Cannons. Damage is good only until lategame.

16) Machine Gun Turret

Unlocked by getting Messiah ending (Mark Skid Dead, Everyone has Tickets).
Very high rate of fire and decent damage till the very end.

17) Saw Turret

Unlocked by getting Very Bad ending (Mark Skid is dead, No tickets). Insane melee damage comes with huge risk.

18) Gunship turret

Unlocked by getting all endings atleast once. The turret is impossible to rotate and it can face either left or right, and it will stay that way till the end of the game. The damage and rate of fire are the best out of all turrets. Just don't let the enemy come from the other side and you should be fine.

19) Ambulance

Unlocked by bringing Terminal Patient to the concert. Pretty much the same as Grusom Armored Truck but with slightly lower mobility and terrible Fender. There is always a free medkit healing your crew, so it's not necessary to buy one.

20) Pimped Standardo XL

Unlocked by bringing Street Worker to the concert. Same as Standardo XL but with less armor and a bonus hidden task. You earn money by RAMMING pedestrians, shooting them will give you no money.

21) Muscle 2000 Satan ed.

Unlocked by bringing Black Metal Head to the concert. Has a tough roof which protects your passengers from damage, Spikes on the side do average damage. Wrench and Medkit problem, as always.
In my opinion, one of the best cars. I completed the game with it multiple times using different weapons and a wrench. With smart repairs, your crew will never get damaged.

22) Muscle 2000 Rage Mod

Unlocked by bringing Rager to the concert. Car has double machine cannons shooting forward which do mediocre damage that is good until second half of the game. 2 Seats.

23) Muscle Vampire 666

Unlocked by bringing Goth to the concert.. It is important to note that you will never get food or repair kits on this vehicle. The only way you can heal/repair yourself is by damaging stuff with your front saws. The damage saws do is quite good. Upgrading defensive stats is reccomended.

24) Object 666

Unlocked by bringing Alien to the concert. Turret shoots plasma balls which bounce off and do good damage. Slow fire rate. Has reduced armor.

25) Gran Duderino

Unlocked by bringing Hobo to the concert. Car with a destructible roof. The main gimmick of this car is the fact that it cannot be destroyed. Damaging segment of the car affects its performance. Your car's speed will go down to the point of full stop and being unable to catch up with the screen. Upgrading your Fender is reccomended. Wrench is mandatory. Stickers with bonus car stats are also advised.

26) Standardo Luchador

Unlocked by bringing Wrestler to the concert. Opposite of Vintage Pubelwagen - Car gives bonus Melee (150%) Damage, but lower (50%) Ranged damage. You still should have someone with Ranged weapon, rest should use melee.

27) T-666 Rocket Version

You don't need shops when you have a bloody tank. No repairs, No upgrades. NOTHING. ONLY YOU AND CARNAGE, SOLDIER! Arcade mode gives no stuff to you either. If you really want to complete the game with this, try Boss mode.

28) T-666 Minigun Version.

IT'S RAINING LEAD, HALELLUJAH.

29) T-666 Flame Version.

For times when you feel cold.

30) Mecha-Skid.

Unlocked by getting all other achievements.. One shots everything (Pazen Mastermind should be rammed). Final Boss can take 2-3 shots. Can be damaged from all sides.

31) Dog of War

Unlocked by bringing Road Warrior to the concert.. Imagine reversed Grusom Armored Truck, except for the indestructible part. 2 passengers that are strapped at front can heal and repair all segments of the car. They can't take over the driver, though.

32) The Condom

Unlocked by beating Groupie Panzer Mastermind.. 1 seated vehicle, The only weapon you have is a reflective shield which reflects all damage, but activation costs money. Focus on upgrading mobility of your car and ramming tasks are reccomended. Money-related stickers are advised.

33) Vintage Pubelwagen

Unlocked by bringing Veteran (gun sergeant chick) to the concert. . Standardo XL but with better damage on ranged weapons and worse on melee. Nothing much to say about this car
Bumper Stickers
Tank has nowhere to put Bumper Stickers on, sooo......
1) Cretine Supplements - Bonus Character Stats - 1000 kills.

Better character stats, sort of "Bonus" 5th upgrade for your characters.

2) Golden Youth - Be Stunning - 6 kills.

Mark Skid gets yellow(blond) hair. Doesn't affect gameplay in any way.

3) Online shopping Haxer!!1 - Start with a Ticket - 500 kills.

Free ticket for Mark Skid.

4) Zhugtar - Start with Zhugtar - 100 kills.

You begin your run at Zhugtar's place. Make a wish and pray.

5) Lucky at slots - 500 kills.

Better luck at slots, obviously.

6) Drugs not pugs - Offensive Stat boost - 750 kills

+1 stat point to both Ranged and Melee Attack.

7) Drugs, not hugs - Offensive stat boost - 750 kills.


8) I do not take drugs, I AM DRUGS! - Get random stat boost - 500 kills.

Random +2 stat boost or +1 for each.

9) If you love your car, DIE FOR IT! - Get car stat boost - 750 kills.

+1 to one of your car stats.

10) Got Wood? - Add saws - 500.

You get a random saw somewhere on your vehicle. This saw is easily destroyable and is not repairable. This sticker is available only for Standardo XL

11) Hur Duhr Creation - Take less damage from eastmorons - 750

Less damage from eastmoron baptists.

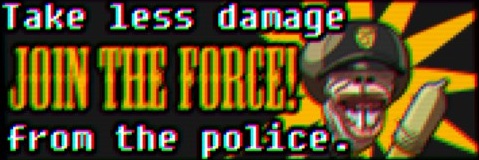
12) Join the Force - Take less damage from police - 750

Less damage from Route 666 Patrol.

13) White Loosers - Take less damage from neo-nazis - 750.

Less damage from Aryan Roadkillers.

13.5) The South will rise! At 2 pm with a hangover - 750.

Less damage from Rednecks. (I forgot about this sticker and wasn't arsed to re-number everything).
14) How's my driving? Call your mom - Bonus car stats - 1000

Slight bonus to all car's stats, "hidden 5th upgrade" as one would call it.

15) Vet - Better starting weapon - 1000

You get a better tier weapon at the beginning of the game.

16) ♥♥♥♥ the wealthy, I want their money... - Start with 1000$ - 500.

Start the game with 1000$. This sticker may not work sometimes for no apparent reason. #drsauceplsfix.

17) Bling! Going Broke to look rich - Earn more Cash - 1000

Better money for doing Tasks.

18) I'm spechul - Get a special item - 750.

One Special item from Lernie Mart at the beginning of the game.

19) My boss is an ♥♥♥♥♥♥♥ - Get tips on a boss - 250.

Get 1 tip on the boss for each sticker purchase, you won't get the same tips. You can look at the hints again in the pause menu. This sticker won't appear again after you've unlocked all tips.

20) Bandage - Unlock a game mode - 500

Unlocks 1 gamemode for you. This sticker will stop appearing after you unlock all gamemodes.

21) Lack a dong? Buy a gun! - Bonus Ranged Damage - 1000.

Deal more ranged damage, This includes damage from turrets and stuff like that.

22) My other car is a tank... My other life has purpose - Add Armor Plates - 250.

Adds 1 armor plate to either protect your passenger or a certain segment of your car. Destroyable and cannot be repaired.

23) Tune or Die! - Get 2 car stats boost -1000

Gives 2 random upgrades to your car.

24) The King of Potato chips - Get better food - 500.

Rank 2-4 Food spawns more often.

25) Hick Smash - Bonus Melee damage - 1000

Improves melee damage, this includes saws and legs of H.O.T.A!

26) ♥♥♥♥♥♥♥ Stick Figures - Add second character - 500.

Start the game with additional character.

27) Trust me, I'm a doctor - Health Bonus - 750.

More Health for yer crewmates.

28) Bitter Christian with a gun - Shoot Faster - 750.

Rate of fire with all guns is increased.
Shops. Part 1
You'll find different shops and stuff on your way to the concert. We'll take a look at some of them.

Steel nerves and balls belong here:

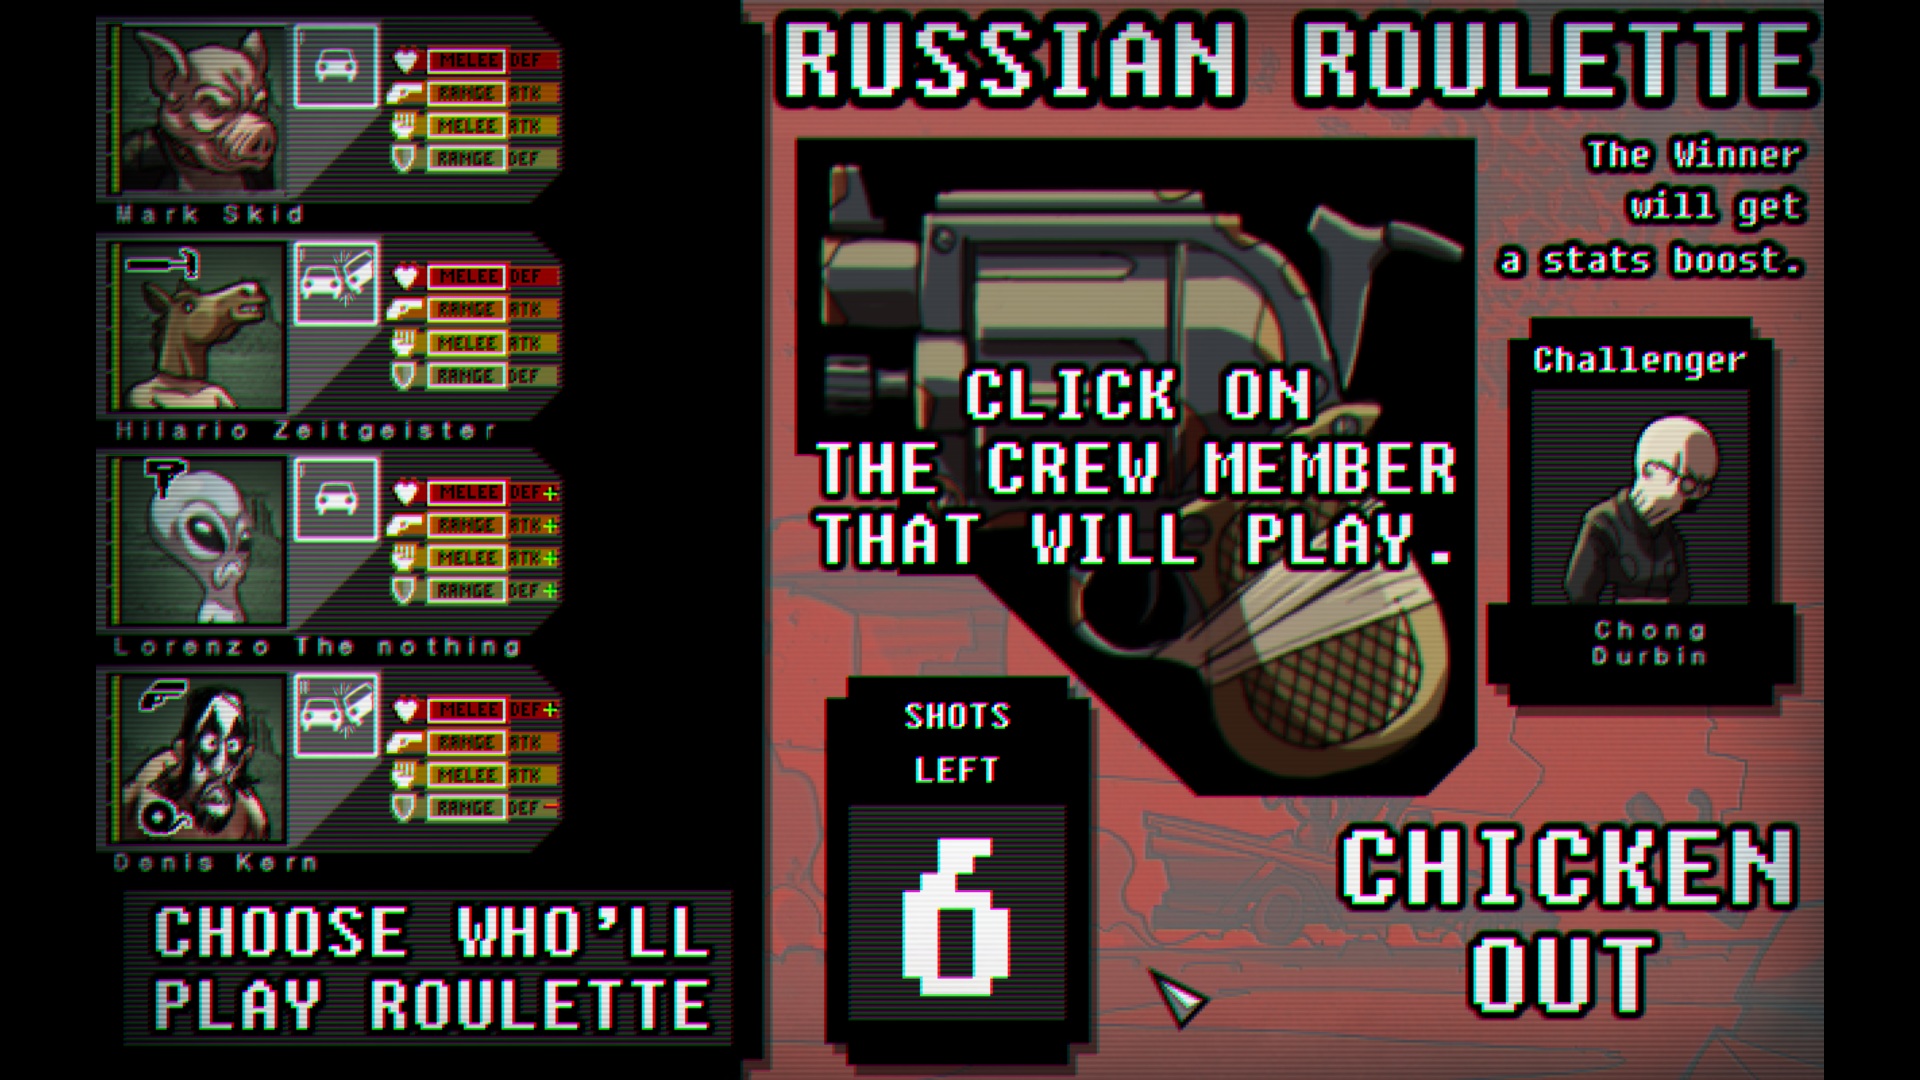
Russian Roulette

There is a revolver, One of 6 chambers has a bullet in it. You choose one of your crew members to be placed against a random guy who is not important, really. You two take turns pulling the trigger and hoping for the best.

Win - Your crew member gets all his stats boosted by +2.
Defeat - Your crew member gets a bullet in his head and dies. duh.

Zhugtar

Is your run going completely wrong? Do you really hate yourself and want RNGeesus to decide your fate? If you answered yes to one of those, Zhugtar is your main man. Upon making a wish, he can change everything, Your car, crew members, upgrades, tasks, their health, pretty much everything you have, he can change up. Not reccomended if your run is going well.


Casino

Slots. You throw decided amount of money inside, Pull the lever and hope for the best. Super prize involves a Bullet and your face.


Mad Science Lab

You can do "things" to one of your crew members here. Leave him in the lab for 1-8 road segments and retrieve him, or not.

Results could vary. Your character could get bonus stat points, bonus money (usually 20%), become different in terms of appearance, or just simply turn into Lernie
When your buddy will be ready to leave the lab, you'll get a sign like this on the road:


No Huge risks in these shops/places

Gun Workshop - Improve your weapons

To upgrade your weapon you'll need a Gun Workshop and a spare weapon to sacrifice. If you have enough spare money, you could buy a gun and give it to driver to "hold on it". You can upgrade one weapon multiple times until it reaches 100% of that specific category. There're 2 upgradeable attributes of your weapons:
1) Speed (Sacrifice Ranged weapons), Affects how fast your gun shoots or how fast you swing your melee weapon
2) Damage (Sacrifice Melee weapons), Affects how much damage your gun or melee does per hit.

Super Weapons are upgradeable the same way. Yellow (Special) weapons upgrade 2 attributes.
Weapon tiers and their upgrade value:
  • Tier 1: 15%
  • Tier 2: 20%
  • Tier 3: 25%
  • Tier 4: 30%
  • Tier 5: 35%
  • Tier 6: 40%.

The Geek Brother's SUPER WEAPONS Collection

This is the place where you buy really, really big guns. They are expensive and rare, but they all deal insane damage and do something cool in their own way.

There're few things you should note, however:
1) You will never, never get Super Weapons when using Cars with a Roof, War Dog, Grusom Armored Truck.
2) Passenger who is using Super Weapon cannot use Special Items bought in Lernie Mart.
The list of Super Weapons:
1) Death Casque - Helmet with a deadly propeller on top of it. Spins automatically and has a huge radius.

2) Pelvis Splitter - Chainsaw with double range. Can hit 2 seats at once and also damages the car. Can only be used from the side of the passenger who has it, though.

3) Bone Bricker - Ranged weapon which shoots deadly bricks. Damage is insane and hits both Crew and Vehicle. Cars with low Fender get destroyed by Bone Bricker very fast, Slightly faster firerate than that of a sniper rifle.

4) Mega Fist - Melee Glove attached to a spring, pushes cars away on a huge distance. Can only be used from the side of passenger who is holding it, as always.

5) Ball of Pain - Melee weapon, ball on a chain. Swinged automatically by your passenger.

6) Doom Saw - Shoots mini saws which pierce anything and deal damage to everything. Useful against Tanks, firerate comparable to the one of shotgun.

7) Face Melter - Ranged weapon which spews liquid which damages car and passengers. Bad range on par with flamethrower.

8) Gut Bubbler - Ranged weapon. Modified Microwave which roasts everything.


Shops (Part 2) and Hikers
The usual shops:

Shop is where most good stuff can be purchased, You can do many things in it. For example:
  • Find new Hikers, Heal your crew with food;
  • Get tasks which are the only way to earn money (not counting money from killing bosses which you first should get to);
  • Buy/Sell weapons;
  • Buy Drugs to upgrade your characters and their stats;
  • Buy stuff from Lernie Mart;
Inside the shop:

1) Snack Bar:
If there is a Hiker available, you'll see an exclamation mark near the name;
On the left we have our slots which determine where each lad will sit. First slot (1) is Driver, he can't shoot nor fight, he can't use special items. But he can hold on to your items and give someone the special item he holds if they have a free slot for it. Rest slots are usually passengers and in-case of turret cars, Turret gunner, they usually take 3rd (3) slot.
Each Hiker that we meet has his/her own Pros and Cons, never forget about that. In early-game it doesn't really matter how bad your hiker is, as long as he/she is available you should take him. If you don't like your hiker, do not upgrade him just yet and try to look for different Hikers. Don't take too long, In lategame there will be almost no Hikers except for occasional Horse Guy.
All Hikers have 4 stats:
1) Melee Defence (How well your guy can take a beating from a melee weapon)
2) Ranged Attack (How well your guy damages people using ranged weapon)
3) Melee Attack (How well your guy can use a melee weapon)
4) Ranged Defence (How well your lad can soak up bullets without dying)


Hikers
(+ MEANS they have a "hidden" +1 upgrade point to that stat, - means they have "hidden" -1 upgrade stat):
1) Alien lad.

Melee Def: +
Ranged Atk: +
Melee Atk: +
Ranged Def: +

2) Terminal Patient

Melee Def: -
Ranged Atk: -
Melee Atk: -
Ranged Def: -

3) Horsey

Melee Def:
Ranged Atk:
Melee Atk:
Ranged Def:

4) Bear

Melee Def: +
Ranged Atk: +
Melee Atk: +
Ranged Def: -

5) Emo Girl

Melee Def: -
Ranged Atk:
Melee Atk:
Ranged Def: +

6) Punk/Anarchist

Melee Def:
Ranged Atk:
Melee Atk: +
Ranged Def: -

7) Veteran (SGT.PTSD)

Melee Def: -
Ranged Atk: +
Melee Atk: -
Ranged Def: +

8) Hippie

Melee Def: +
Ranged Atk: -
Melee Atk: -
Ranged Def: +

9) Hobo

Melee Def: -
Ranged Atk: -
Melee Atk: +
Ranged Def: +

10) Rager

Melee Def: +
Ranged Atk: -
Melee Atk: -
Ranged Def: -

11) Black Metal Head

Melee Def: +
Ranged Atk:
Melee Atk:
Ranged Def: -

12) Road Warrior

Melee Def:
Ranged Atk: +
Melee Atk: -
Ranged Def:

13) Goth

Melee Def: +
Ranged Atk: -
Melee Atk: +
Ranged Def: -

14) Gimp

Melee Def: +
Ranged Atk: +
Melee Atk: -
Ranged Def: -

15) Wrestler

Melee Def:
Ranged Atk: -
Melee Atk: +
Ranged Def:

16) Street Worker

Melee Def: -
Ranged Atk: +
Melee Atk: +
Ranged Def: -
Tasks/Jobs - Blood money.
Tasks/Jobs:
You can clearly smell money in here. Kill stuff in different ways and earn money to spend on nice stuff


There're 3 icons on the right, Each icon means a task which upon completing gives you a certain amount of money. All Tasks have 4 levels, higher level, more money.
You could split tasks into 2 categories: General and Specialized
General tasks usually are easier to do but they give less money than Specialized tasks. The Roman number thingy in top left corner of task shows its level.

1) Car Destruction (in any possible way)


2) Survive the level/road segment.


3) Crew Member Decimation (Just kill enemy crew members)


4) Reaper Task (Kill anything, pedestrians, crew members, etc.)


Specialized tasks are trickier to do than General ones but earn more money.

1) Ramming Task (Destroy the Car without wiping out the Crew inside it by ramming it against guardrail)


2) Demolition task (Explode stuff. Suicide Bombers, Clowns, Motorbikes count)


3) Melee destruction task (Destroy the car by only using Melee weapons, but do not wipe out its crew,) Works on robots.


4) Crew Member decimation with Melee weapon (Kill Crew Member with a melee weapon, This task will count as long as Final blow to the guy was dealt with a melee weapon)


5) Crew Member decimation, Ranged (Kill Crew Member with a Ranged Weapon)


6) Ranged Car Destruction (Destroy the car by only using Ranged Weapons, do not fully wipe out the crew). Works on robots.


When Task is completed, it is highlighted in green color.


Important thing to note is that when your passenger who holds the task dies, Task IS gone with him. Tasks DO stack and it doesn't matter who holds them, as long as he/she holds them and doesn't die.


Arms Dealer. Everyone loves firepower.
Welcome to gun shop!


Here you can buy any weapon you'd like, limited only by your taste and wallet. Point your mouse at any of the weapons and you'll get a pop up with some information


What do you need to consider when picking a gun? First of all, Tier of the weapon. Higher Tier means better weapon. Second thing what you should consider, is the price.
Weapon is divided into 2 types (Geek weapons too) - Ranged and Melee. To decide who gets what gun, look at their stats.
Special Weapons (Golden, also applies to the Tier system) - Is like unique weapon of that tier and type, but with special upgrade. If Arms Dealer gets such a weapon, there'll be an exclamation mark.

We highly reccomend not going Melee or Ranged only weapons. Some enemies in the game will seriously hurt you, certain bosses are killable ONLY by one type of the weapon (Brain Tank, Bumper Car)

Your crew member can have only one weapon at time. Your Driver cannot use weapon or special items, He/She can only drive. You can still give him a weapon to "hold" onto so you could use that weapon later for upgrades in the Workshop.
Garage. Pimp that ride.

In the bottom left of the screen you can see how damaged your car is. As soon as one of your car segments (from 4) gets damaged all the way to 0%, your car WILL explode. This is why it is important to try to maintain your car health above 50% at all times. You can either Upgrade or Repair your car in the garage. Repair Kits (as I call them) have 2 tiers:
  • Quickfix - repairs all your segments by 25%
  • Garage - repairs all your segments by 50%
In the middle of the screen you can see different upgrades for your car, There're 2 types of them - Usual and Super Upgrades (You won't get Super Upgrades until you beat Clowns atleast once)
Usual Upgrades add +1 Stat point to 1 out of 4 Car Stats:

  • Fender - Armor (Car's ability to soak up damage before going boom-boom)
  • Steering - Turning Left and Right (Strafing, basically. Also determines how well you can push vehicles to the guardrail)
  • Brake - Brakes. duh (Speed with which you'll drive down. Better Brakes mean easier pushing vehicles off-screen)
  • Engine - Forward moving (Better Engine, easier pushing off-screen again)

Super Upgrades - Exclamation Mark suggests that there is a Super Upgrade available. Super Upgrades give +1 Stat Point to 2 of 4 Car Stats:

There're only 2 Super Upgrades in the game so far, those are Drivetrain(Upgrades Steering and Engine) and Light Armor Upgrade(Upgrades Fender and Brakes).

All 4 Car Stats can only be Upgraded 4 Times.
Drug Dealer. Drugs do people.
There're 2 kind of Drugs - Usual and Super.
Usual drugs give +1 Stat Point to one of 4 Stats.

Super Drugs - Shop is marked with an Exclamation Mark if there're any Super Drugs.
Super Drugs can either upgrade 1 Stat by 2 Points or 2 Stats by 1 Point.
Character Stats cannot be upgraded more than 4 times.

SUPER DRUGS WILL ONLY BE UNLOCKED WHEN YOU BEAT BANDCRUISER(LANDCRUISER GROUPIE) ATLEAST ONCE.
Lernie Mart. You're special!

Lernie Mart items could be divided into several categories:
  • Car Repair -
    -Wrench - A must have item to survive on the violent Route 666 (for the most cars, atleast.). Toggleable Special Item which allows you to repair one segments of your car on the road for some money per repairs. The Passenger cannot shoot or attack while using the Wrench. Wrench will not repair your car if you have no money.

    -Duct Tape - One time use Special Item which repairs all your car segments by 25% upon usage. Could be useful when you have no Wrench (But don't rely too heavily on one time repairs) or when you need emergency repair and Wrench can't keep up with tthe damage.

    -Foam Can - "Upgraded" Version of Duct Tape. Fully heals your car to 100%, no matter how damaged it is.

  • Healing
    - Medkit - Healing variant of the wrench. Toggleable Special Item which allows you to heal 1 passenger at time at cost of your money.
    - Autoinjector - One time Item which Fully Heals the Passenger with lowest Health.
  • Passive Items
    - Knuckles - Boosts Melee Attack of the Passenger who holds it
    - Scope - Boosts Ranged Attack of the Passenger who holds it. Works even with Flamethrower. Does not affect Turret Damage.
    - Kevlar - Improves Ranged Defence of the Character
    - Hockey Pads - Improves Melee Defence of the Character
  • Other Stuff
    - Nitro Boost - Enchances all your car stats for one Road Segment
    - Brick - Throwable Item which does damage upon hit
    - Grenade - Upgraded version of the Brick, basically.
    - Mine - Droppable item which explodes upon contacting other vehicle. Automatically gets dropped BEHIND your car.
    - F**KING TICKET - A very important item, in order to get a Good Ending, EACH of your passengers must have a ticket by the time you reach 0 KMs. Passengers LOSE their ticket upon Death.
    -Tear Gas - One time throwable which upon contact with enemy car makes passengers unable to attack for short amount of time.
    - Ciclonslash (Poison gas, whatever) - One time throwable which damages passengers over time (affects your roof cars aswell, if you're hit by one)
    - Towing Voucher - A special item that is consumed upon defeating a boss that gives your car random pieces of armor. The armor pieces go away with enough damage and they cannot be repaired , you'll have to get another Voucher and defeat a boss to get more armor pieces.
Baddie overview
On your way to the concert. You'll encounter several factions (I'm bad at words so this is how I'm calling them now). None of them are friendly and the closer you're to the concert, the stronger and badder baddies will be. You'll be facing mainly 4 factions: Aryan Roadkillers, Road 666 Patrol, Eastmoron Baptist Church, Trailer Park Patrol. Occasionally you'll also have Groupies, Aliens, Geeks and Lernie's Furends thrown into the mix. Now then, let's take a better look at these fine things people.

Overall, There're many types of vehicles you'll fight on your way to the concert and most factions can drive them without problem (excluding Geeks, more on them later), but each of the main 4 "factions" have their "signature" vehicle which is exclusive to them.
Each of these 4 have 2 "unique" enemies which usually are tougher than your average idiot on the road and have a certain "theme" going with them.

  • Aryan Roadkillers


    Stay anywhere but behind the rocket car

    • Machine cannon Turret car. Passenger will always carry a Machine Cannon

    • *Forgot their name*
      4 seater car with snipers.

  • Eastmoron Baptists


    Probably not a good idea to try and destroy the rear

    • 4 seater car with everyone having a sledgehammer


    • Armored truck with flamethrowers.

  • Route 666 Patrol


    Fast and tough car, go for the crew.

    • 4 seater with roof and baseball bats


    • Saw Turret Car. Passenger carries a Saw

  • Trailer Park Patrol


    Melee at your own risk

    • 4 seater with shotguns.


    • 4 seater with a roof and assault rifles

  • Probing Aliens


    They don't have "special enemies" As far as I know, BUT. Their signature vehicle is combination of Rocket Car and Combine Harvester, which means they are extremely dangerous in close combat. It also seems like their passengers are tougher and do more damage. Their cars have less armor, just like the Alien car.

  • Geeks
    No signature vehicle. They always carry super weapons and always ride 4 seaters with no roof, they can also appear in someone else's vehicle (usually 1 per car).

  • Lernie's Furends


    Every ♥♥♥♥♥♥♥ vehicle is signature for them because they're ♥♥♥♥♥♥♥ terryfying. They are not as tough as humans for the most part, but their cars usually have armor plates and other car upgrades way earlier before others get them
  • Groupies

    You usually encounter them in 2 and only 2 situations. Either it is a boss fight or you're mid-way to the boss fight. You will ALWAYS encounter them and you should be well-prepared for them. They are tougher, they got bigger guns and their cars are well armored. They do have a signature vehicle of some sorts. Because nobody else has it. It is an armored 4 seater car with indestructible roof. You'll most likely encounter it late in the game and it's one hell of a problem.
Road Signs
Over the course of the game, you'll encounter different road objects and whatnot: Enemy Factions on their cars, Pedestrians, Oil puddles, Bad asphalt, etc.
pls note, I forgot all the names of the signs (names get occasionally mentioned) so I'll use my own

Starting with Road Signs and their meaning

Upon Choosing a Road Segment, You'll see some road signs predicting what will you encounter on the chosen Road Segment.

-Road Holes

Those little holes on the road deal damage to your car upon hitting one of those. They may not deal much damage, but there's a lot of them. They can easily destroy your car if you're unprepared or your car is in a bad state.


- Oil Puddles

Doesn't do any damage to your vehicle but upon driving on one of those you'll lose control of your car for a second and most likely will smash into guardrail, which does heavy damage.


- Junk

Does little damage to your vehicle.


- ROBOTS


Prepare to meet the robots, they're small and fast moving. You have to kill them as soon as possible or they will deal heavy damage to your car. The most dangerous robot is a Saw one. Easy way to destroy a Robot is to either ram them into the Guardrail or Smash it between 2 Cars (Kills it almost instantly).


-Groupies
Groupies
Tougher variant of the usual enemies you meet. Be prepared for a challenge.

- Suicide Bombers
*Picture is missing, imagine demolition task icon for now*
Annoying red-lighted guys on the road who explode upon coming into contact with your vehicle. Their explosion does heavy damage to your car and bunch of them at once can easily destroy your car.

- Trucks

- Bunch of the road traffic which you cannot destroy nor move. Doesn't mean they can't push you off screen and destroy you, though.


- Helicopters

Annoying idiots on helicopters who throw Smoke or Poison Grenades at (usually) you. Smoke Grenades makes you unable to attack, Poison Grenades do solid damage to your passengers (even if you have roof)


- Heavy Traffic

More than 1 enemy car will appear. Usually resulting in a massive fustercluck on the road. You can make them kill each other and then finish off the remaining ones, though.

- Boss

Be prepared for a fight with one of the bosses upon seeing this segment, You cannot avoid a boss fight.

- RPG

On the sides of the road there will be pedestrians with Rocket Launchers shooting at you, Rockets do damage to your car (and enemy car if there is one). You can dodge rockets, though.

- Cargo Truck

There'll be a Truck with 4 Crates on it, Deal enough damage to a crate to "loot" it. Crates are tough to crack but usually they will have good reward in them. You can only choose 1 item to keep from looted crates.

- Pedestrians

Bunch of harmless pedestrians spawn on the road for you to slaughter. Visit road segments with Pedestrians for good money if you have Reaper Task.


- Motorbikes

Bunch of Motorbikes who occasionally shoot you appear. They are easy to destroy, don't worry about them.

- Random

You may never know what lies ahead, but usually it is something unusual.


You'll also see 3 polaroids which tell you how far you made it so far.
Bosses and how to deal with them.
Bosses:
The usual tactic against most bosses is to deal as much damage as possible and receive little damage. The another thing you should know is that most, if not all bosses in the game have very predictable attack patterns, after playing the game long enough, all bosses should be a piece of cake for you .Let's take a closer look at each of the Bosses

1) Groupie Death Saw

Small saw-like car with crazy ♥♥♥♥♥ holding an Assault Rifle on top of it. Her Assault Rifle isn't much of a treat compared to her Saw transport.
Stuff:
  • Don't bother with melee, seriously. You'll just take too much damage and deal zero to no damage to her.
  • Saw has a very predictable circular pattern which is easily avoidable by staying near the middle of the road. Do not stay near corners if you don't want to take guardrail + saw damage.
  • ♥♥♥♥♥ will only shoot her Assault Rifle when she's not busy ramming you or moving around.
  • Focus on one of the 4 segments and you should be fine.
  • Saw does more damage to your vehicle rather than your passengers.

2) Groupie T666 Tank (Panzergruppies)

Comes in 3 Flavors: Minigun, Flamethrower, Rockets. You can only damage the rear of the tank.
The best advice for Minigun Tank is to stay behind it (but don't overdo it, it might squash you between itself and guardrail).
Flamethrower has a really predictable pattern which consists of being either left or right and going from the top to bottom while spraying everything with flames that isn't behind it (by behind I mean from the side its on). Upon being damaged enough, goes into frenzy where it'll spray everything in bursts while moving unpredictably
Rocket Tank tries to aim at you (slow rotation speed of the turret) and at certain point stops rotating to shoot some rockets, also shoots low-damage assault rifle into the direction it is aiming at.

Some stuff:
  • Melee does great damage to the rear
  • Best way to die is stay infront of it
  • All enemy turrets in the game (not only this tank) have "blind spot" on their left. Drive up and down abit while staying to the left of the turret to "confuse" it and have difficulties aiming at you.

3) Groupie Bumper Car

Fully Immune to Melee damage, has a passenger inside which will shoot you in burst-fire with her assault rifle. Focus on the rear segments of the Bumper Car and try to not let it push you to the Guardrail. Do not try to push it to the Guardrail if you don't have powerful Steering.
Stuff
  • Forget about pushing it off-screen
  • It is possible to deal damage to it by pushing it against Guardrail. But it won't be easy.
  • Try to finish the boss off as soon as possible, you cannot kill the Passenger with assault rifle.

4) Groupie from Outer Space

Can be a tough boss until you learn her patterns
Stuff
  • Don't bother shooting it while its shield is up.
  • Does 4 laser attacks in 4 different spots. She never fires in the same spot twice. After that she does her swooping laser attack, unless you'll drive to her left or right too early. In which case she'll simply begin her 4 Laser attack again.
  • Her Shield is down when she attacks you.
  • Sometimes after doing her swooping laser attack, she'll move to the center of the screen and start an almost complete 360 degree laser attack. If your speed is terrible and laser is about to hit you, Minimize the damage by going through it, instead of trying to run away from the laser.
  • It appears that throwable special items (Brick, Grenade, Rocket) seem to deal with Groupie from Outer Space very well. UPDATE: I've shot rocket at her at one point (I made sure the shield was down) and it didn't seem like lots of damage to me, Can somebody else test this out?

5) Groupie Panzer Mastermind

The bane of Ranged only runs. Each bullet/rocket you shoot at her turn into a bubble which she'll release at random periods of times. Those bubbles upon contact with your car will explode and deal moderate damage to your vehicle.
Stuff:
  • She will take damage from being rammed into guardrail.
  • Sometimes she will force your crew to shoot her
  • Her attacks consist of inversing your driving controls, pushing you off-screen or to the guardrails using telekinesis.
  • Flamethrower works against her. You can use flamethrower to damage her, but it won't be quick.
  • To avoid as much damage as possible. Aim your crew members at the opposite direction from her. She will still force your passengers to turn around and shoot her. But turning around will take some time and prevent some bubbles.

6) Groupie Landcruiser

Turrets are usually random and come in 3 different flavors (Explosive, Rocket, Bullets). Fires in predictable patterns and there're tons of safe spots where you can avoid all damage. Only rear of this tank is vulnerable. Melee (supposedly) does more damage.

7) Jenny5 Groupie Robot

Pretty much exactly same like T666 Tank, but smaller and faster.

8) Dead Groupies

Spectral Groupies, they are invisible most of the times and in order to see them you have to damage them. Probably the most annoying and unpredictable boss.
Stuff:
  • Focus on one segment of the car
  • They have 2 types of attack. They can either become fully invisible and start trying to ram you to the guardrail while meleeing you with their sledgehammers. Or they could aim in 3 random directions and shoot out spectral bolts which deal damage to your car upon contact.
  • Forget about killing "passengers". Focus on the car.

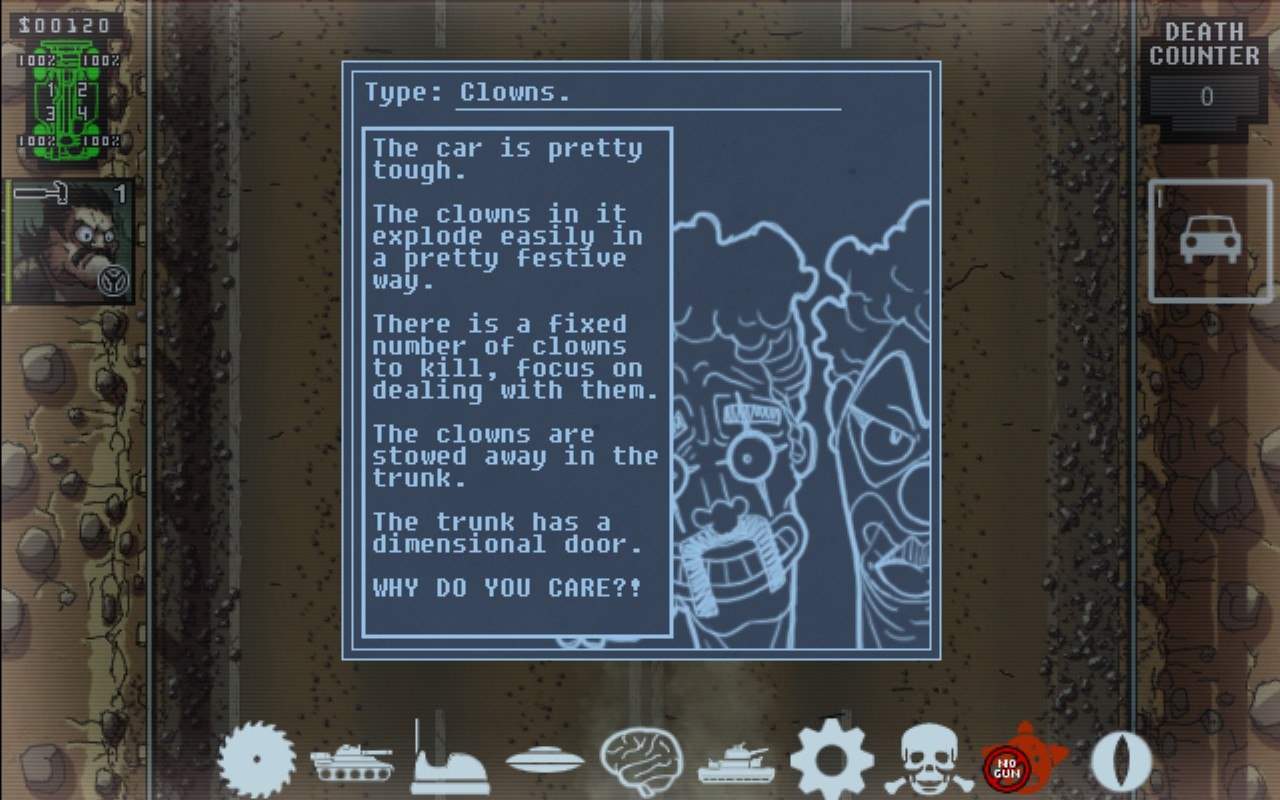
9) Clowns

Small car packed with dozens of Clowns. Clowns have low HP and explode upon death ( Don't think that their explosion deals damage to you), thus making them good for Demolition task. The Car is possible to destroy, but it takes too much effort and killing clowns is way, way easier. The number of clowns inside is based on how far you've made it so far in the run. Weapon that clowns use is random (They can't get Geek Weapons, aka Super Weapons, though.)

10) Reptillian Twins

Can only be met on Standardo XL. They fully copy all your upgrades, crew, everything. They mirror your movement and they constantly aim at you. They shoot only when you'll shoot, etc. Best way to deal with them is by having a melee guy (hopefully one and only melee guy from your crew). There's not much else to say about them.

11) Wormy

Occasionally homing mines will float from left or right side of the screen. Wormie will shoot out toxic liquid every once in awhile at everything infront of him. Just stay to his left or right and you will be fine.

12) Failed Lernies

3 terrifying turret abominations shooting at you.

13) Big Mama Robot

Constantly spawns small robots. Doesn't have any attack of its own, as far as I know.

14) Sleazy Riders

Bunch of bikers, just keep shooting and meleeing through them.
1 KM. REPENT

You've came this far, Are you ready to face your last obstacle that stands between you and an ass-kicking concert?
There're 4 Final Bosses, 1 for each Faction. Each boss has 4 "stages" depending on how much damage he received.

1) V-666. Aryan Roadkillers main man.
Stuff:
  • Sick exhaust of his does sick damage to your car, avoid staying under it for too long.
  • Can smash you into the guardrail if you won't be careful.
  • After his 1st stage/phase, he will start spawning cars full of Aryan Roadkillers that will try to kill you.

2) Mecha-Cop - Route 666 Patrol's Guardian.
Stuff:
  • Each 7-8 seconds will release saws on both of his sides that will damage you and stay there for 2-3 seconds before going back in.
  • Stage 1 and 3 is when he will use Saws. Stage 2 and 4 is when he will use his double miniguns. He also starts spawning lots of robots and motorbikes on Stage 4.

3) Death Prophet - Eastmoron Baptists's leader. Hates everything.
Stuff:
  • Will start spawning robots on 3rd and 4th Phase.
  • Try not to stay infront of him.
  • Will release saws for 3-4 seconds as soon as you reach Phase 4. Drive away to avoid heavy damage.

4) Prize Pig - Trailer's Park Patrol's Pride.
Stuff:
  • Shoots explosive rednecks which do insane damage to your vehicle
  • Will home in on your vehicle on stage 3, Keep moving and shooting.
  • The burning rednecks which Pig will shoot at stage 4 deal less damage than usual rednecks but there's much, much more of them.

Still, the best strategy for every Final Boss is keep shooting and not giving up. You've made it this far, you surely have what it takes to beat the Final Boss.


Concert awaits... or not? (SPOILERS)
You made it!


There are few endings in the game:
  • Traditional Game Over - You never made it to the end and your car/passengers has been destroyed. Probably the most common ending lmao. After each death you'll get useful tips that may help you in your future adventures. I've seen this ending many times, do not give up.


  • Bad Ending (Mark Skid lives but no tickets)


  • Semi-Good Ending ( aka Messiah Ending, Mark Skid is dead but everyone has tickets.


  • Very Bad Ending (Mark Skid is dead, No tickets.)


  • Good Ending (Mark Skid is alive, Everyone has tickets)


Every Hiker that you bring to the concert with a ticket, Every boss you destroy (except for final bosses), Every ending you get will unlock you something.

It's almost over. Links and conclusion.
It took some time to gather everything for this Guide. But now it is finally written (and translated).
We really hope that this Guide will help you understand Death Skid Marks better and enjoy it as much as we do. We really tried.

I'm 100% sure I've made some translation mistakes while translating this all, Feel free to point out your suggestions, my mistakes, anything that you feel like will help. Do not be shy to comment. Thank you for taking your time and thanks to the original writers for giving me permission to translate all this. As future updates come, I will try my best and update this guide accordingly.

Links! Below!

Videos of full runs with starter cars


A great guide more focused on helping you completing the run rather than overall game mechanics.
http://gtm.you1.cn/sharedfiles/filedetails/?id=400073671
36 Comments
Hunter Takedown 4X4 27 Jun, 2023 @ 2:40pm 
Tested out the Rock-it tank, hahahaha i am so funny

GFOS IS imune To Rockets.

EDIT: Ok i KILLED her,


...time to kill: FOREVER.
Ryuu 13 Nov, 2018 @ 1:25am 
If you bump into Zhugtar early — use it, might give you some good car and crew :)
Or not, might give you a tank which can't visit shops hehe
Caesar  [author] 13 Nov, 2018 @ 1:19am 
It can be a bit luck-based. But once you play for a decent time, you'll realize that everyone in this game has a specific "pattern" with which they attack you. This applies to both Bosses and regular enemies. It comes down to knowing these patterns and having good long-term planning. It took me like 35 hours before I had a succesful run to the concert. And even after that I had a lot of unsuccessful runs. Don't give up just yet! (But don't force yourself to play the game. Enjoyment comes first)
Bot David 12 Nov, 2018 @ 12:37pm 
Great guide.... I have 56 hours and I still haven't gotten to the concert...
Ryuu 25 May, 2018 @ 12:35am 
Make them.
real british joker (real) 24 May, 2018 @ 12:46pm 
Can smne give me screenshots of all golden weapons?
Caesar  [author] 3 Jul, 2017 @ 6:12am 
Thank you for the screenshots, I'll edit the guide in a bit
ManOfHonor 3 Jul, 2017 @ 3:17am 
I made a screenshot for you, here goes: http://gtm.you1.cn/sharedfiles/filedetails/?id=962984335
Caesar  [author] 2 Jul, 2017 @ 8:09am 
it was a special item that you could get in store, one time use. I haven't really been playing the game much nor looking much after the guide, sorry.