Sir, You Are Being Hunted

Sir, You Are Being Hunted

457 ratings
The full monty to Sir, You Are Being Hunted
By VsTheWall
An attempt to make one of the most complete guides for Sir, You Are Being Hunted.
2
2
7
3
   
Award
Favorite
Favorited
Unfavorite
Introduction and Basics
Well...seems you're in a bit of a pickle, what with you being stuck on an island chain filled with robots who want to role-play The Most Dangerous Game. Hence why I'm here to help you not only get through this torrid ordeal, but possibly turn the tables on your pursuers.

General Information

We'll start with the basics. Sir is a first person shooter with a huge focus on stealth, survival, and inventory management. The devs themselves have described it as a British S.T.A.L.K.E.R. with robots. Your ultimate goal is to roam the archipelago and find the missing teleporter pieces (hence forth referred too as "telebits") that exploded and flew off, and reassemble them at the Standing Stones. All the while you are being hunted by an increasingly dangerous crew of robotic gentlemen.

As mentioned, stealth plays a huge role in the game as you are often outnumbered and outgunned, and discretion is often the better choice of valor when robots are near. Your vitality will constantly drop, so scavenging and hunting for food becomes an important gameplay element. Finally, your oh-so-limited inventory space will always be a concern as you wander the islands. More info about these subjects will be covered later.

Movement

If you have played any sort of first person (or third person) game before, the controls should be fairly obvious from the get go. In addition to the standard movement set, sprinting and crouching can be used to modify your stance and the Q and E keys can be used to lean around corners. Jumping is naturally mapped to the Space Bar

Finally, pressing Alt will allow you to use your mouse to look around without changing your movement direction. The game does support TrackIR for those fortunate enough to have it and will replace the alt key function if enabled in the control settings.

An interesting glitch regarding the terrain mesh itself can be used to your advantage. Your character will, for lack of a better word, 'stick' to the terrain mesh (in the picture to the left, terrain mesh is the green grass part, NOT the rocks) without sliding or falling like other games often have. This can be used to scale almost vertical surfaces by simply jumping up the side of a slope while moving forward. It also works for descents, allowing your character to simply walk down some impressively steep drops without incurring damage. It should go without saying but this gives you a massive advantage over the bots in the mountain biome.

Health and Vitality

As you are off exploring the islands, your vitality will be constantly ticking down at a steady rate (1 point every 10 seconds, to be precise). The only way to replenish it is to eat food. If you take any damage your health will come back at a relatively rapid rate, but only if your vitality is over a certain point (over half). Certain foods will replenish different amounts of vitality while others will actually drain it. Food types will be covered later. To eat food or drink alcohol, right click your desired morsel and then hit the use button that will pop up

One of the biggest dangers to your livelihood is bleeding. Bleeding is a stat that can occur randomly from gunshots or melee attacks. It's indicated by a flashing drop of red blood near where your health and inventory icons are located. Bleeding will cause your health to drop at a tremendous rate and will not stop until you apply a bandage. Rags are the only thing that can be used as a bandage, and are some of the most important items you will need on your journey. Rags are hot-keyed to a keyboard binding, although I changed mine to one of my mouse buttons to allow for a quick patch while either fleeing or engaging enemies.


Inventory

Part of the difficulty of the game involves your ability to manage your inventory. Although it may initially seem like you have more than enough room for items, you will run out of space very fast and very easily. Playing Tetris with your inventory will be a task you will find yourself doing often, especially when trying to pick up telebits. Food should always be carried with you, as well as any distraction items you may find. Any weapons will take up a large portion of your inventory as will extra ammo. Bandages should be carried in abundance as well lest you fall prey to a quick death. And finally the teleporter pieces themselves must be placed in you inventory, taking up space until they are safely deposited back at the stones.

Stealth Intro

Stealthy movement is highly advised when moving across the countryside. It will prevent you from being ambushed (for the most part) and it can save your virtual life if you're being pursued and need a quick escape (for the most part). While fighting isn't always an option, stealth is almost always a good fallback if things go from butt to front.
How to Win
The whole purpose of this game is to retrieve and replace missing teleporter parts. These telebits are the most important items found on the maps, and therefore should take priority in your attention and your inventory space. The blast spread them out in varying locations, but the center island will always have the largest pieces as well as the highest quantity. The outer islands will have pieces that can at most take up four slots and as little as a single slot. All the pieces are required to beat the game with your inventory screen showing you what’s left in the game world.

A large majority of the pieces will spawn along the coastal areas of an island, so it's generally a good idea to start your search from the outside and work your way in. There also tend to be fewer and more easily avoided patrols along the coast.

The pieces will be found in small craters in the ground. They produce a white smoke that can be seen from a considerable distance (try not to confuse it with black smoke from campfires). More often than not, the robot hunters will have set up some of their ilk to guard any pieces they find, so dealing with the guards becomes a major focal point in the game.

The ideal way of getting around the patrols is to use one of your many distraction items. Bottles are an invaluable distraction tool for these parts because you can throw them behind hedges or trees. The robots will usually pick up on the sound and they will all go to investigate the noise. Alarm clocks are also great; just set the timer to 30 seconds or more and place it, then pick your way around the teleporter piece to another position and wait for the alarm to go off. You will usually have plenty of time to get to the piece and get away all without being seen. As soon as you pick up the teleporter piece, the guards will immediately lose interest in the site (you will usually hear a loud collective beep) and go back to patrolling the map.


The small blue lights in the above picture are called Wisps (I'm assuming they're supposed to be will-o-the-wisps). These little buggers will randomly spawn across the countryside and fly towards a point of interest. More than 90% of the time, it's a teleporter piece. However, they seem to occasionally get lost so pay attention to where they are leading you. When a wisp gets to a telebit it will begin to circle it upwards into the sky, along with any others that manage to congregate. They are sometimes a better indicator to where a piece is than the white smoke.

Another location method is the scanner. This somewhat rare item will, when activated, show you the location of a nearby piece. Although it has a large range the islands are big enough that you may not find the pieces easily without some dumb luck.

Your inventory screen keeps track of what pieces are left on each island so you can narrow your search a little better as you clear more areas.

Somewhat rarely pieces can appear on some of the islands that surround the main land. These should be unguarded for the most part unless the island is large, but extra care should be taken when swimming for any amount of time in this game...
Loot and Loot Sources
Items are obtained from loot sources. For the most part, these sources are buildings and dead enemies. But be on the lookout for miscellaneous objects that are considered loot sources, such as waste bins and barrels. Buildings are explained in detail in the following section.

Items come in one of five different states. Green items are useable. Most of the time this is used to describe food items. Anything that’s food with a useable stamp will always be beneficial to you. Yellow items are labeled as dubious. They can be used, but it's not really known if they will hurt you or help you until you try them yourself. If the food is good it will give you vitality, though not as much as most of the green foods. If it's bad, it will sap away your vitality instead. While I don't want to spoil what does what, this is a walkthrough and a food chart will be found further down in the guide for those that wish to know more about the dubious items.

Orange items are ammo. Ammo has a maximum limit before it spills into another inventory slot. Being that this is a difficult game, it's often a dreadfully small limit. As ammo is fired through weapons, it depletes the ammo count for your current weapon until expended, at which point the inventory space frees up again. Red items are junk. They are there to take up some space and occasionally add some humor. You can safely discard anything labeled junk and not worry. Finally, purple items are labeled as mysterious. Telebits are given the purple label, as well as the voodoo doll. The voodoo doll is used to provide the player with certain powerups.

Buildings

One rather unique quirk to Sir is how buildings work. It is absolutely impossible to enter any buildings. Big Robot has explained precisely why they won't use building interiors, and I don't feel the need to go into too much depth about it. Long story short, the performance hit is not worth it and the team would rather focus their efforts elsewhere.
Buildings are instead treated as massive loot chests. Any entrance located on a building will have loot inside of it. Do note that buildings with multiple entrances will have separate loot per entrance. Much in how you can remove loot from a building, you can also stash loot. Its a good idea to find a building nearby the starting area and claim it as your loot hut. Although robots will always have a chance to guard a building, they will not loot it so any items will be safe inside.

A few of the buildings are worth noting. Pubs can be found in almost every biome type, and often carry a weapon of some sort with rifles being the most common. They also carry alcohol, obviously. Hermit shacks come in two varaieties, with one being found in wooded copses and the other being found out in open fields with a campfire attached. They are both good sources of dynamite, and the open field variety can contain vodoo dolls.

A good rule of thumb with loot quality; the larger and more stately the building, the better the loot.

Telebits can be placed inside of buildings for storage, but other than your own memory, there will be no indication that they are located within. DO NOT FORGET WHERE YOU PLACE THEM!!
Hunting
Looting food items is not always an option in Sir and you may need to resort to hunting. There are two animals to hunt, the rabbit and the pheasant. Both provide a substantial amount of meat when cooked on a campfire, but will take up a large amount of inventory space. Although it doesn't quite count as hunting in the same way as the animals, any robots that you kill will have a slight chance of carrying some raw meat on their person.

Hunting game is as simple as pointing and shooting, although if you're lucky you can catch a rabbit with an axe. Hilariously enough, I've seen pheasants kill themselves by running into trees or buildings, but this is an exceptionally rare event.

Both game and raw meat are not very useful by themselves, but when used on a lit campfire they produce cooked meat which will give you a rather large vitality boost in exchange for taking up miniscule space in your inventory.

Be sure to hightail it out of the area after you light a campfire. The fire will draw hunters in from all over the map to investigate, so cooking must be done quickly. When lighting a fire, you need to use matches on the log pile to activate it. Matches are one use, but a box of matches can be used infinitely
Stealth
Stealth is one of your more usefull abilities. It allows you to avoid most encounters altogether, while enabling you to escape from all but the stickiest of wickets. Above the health and vitality counters lies the visibility meter, which utilizies an eyeball that becomes more or less transparent depending on your surroundings and movement. The less visible the eyeball is, the more stealthy you are. An explody looking icon means that you are either in combat and being actively shot at, or you are holding a lit flashlight at night. In other words, the eyeball shows you have a potential for being seen, while the explody thing means you're either being seen or going to be seen. The rings around the outside also get brighter and larger as you are more visible, and disappear completely when hidden.


Examples of bad and good visibility, respectively.

The main things to consider when trying to hide are objects that provide concealment; grass or bushes, and objects that are static cover; trees, walls, and buildings. Grass can provide excellent cover, but be aware that all hunters will be able to spot you if you are close enough to them. As well, aggro'd hunters will be able to pick you out easier even if your meter is completely blank.

In addition to keeping a low profile, you must be mindful of any sounds you may make. Sprinting will obviously attract more attention, as will walking instead of crouching. However, certain items you will find can make sound as well. For instance, the telebit scanner will make noise that can attract nearby bots. Even bandaging yourself will create enough to entice any gentlebots around you to come and investigate. Flocks of birds are actually some of the worst events that you can trigger in the game. Birds are not very noticeable when they are on the ground or in trees, but when you walk by them they get spooked and fly off, creating a racket and a good visual indicator that you are there. More than that. they LOVE hanging around villages. If you startle some birds, it's a good idea to run.

Sound can be used to your advantage, however. Robots will investigate any thrown items, while noise makers can be used for an extended distraction. Do remember, stealth isn't as effective if they already know you are nearby so if all else fails...FLEE! You can run faster than all but two of the automatons, but even they have trouble getting around walls and hedge rows.
Distraction
Tying in to the stealthy nature of your character you can often find random items that can be used to distract any robots; luring them away, or even drawing them towards you. Coupled with stealth, these two methods make it possible to play through as a pacifist, or even as a completely undected ghost. Patience and careful planning are essential when it comes to luring your foes away.

Distraction items can be broken down into two distinct categories; noisemakers and thrown objects. Noisemakers include toy trains and alarm clocks. Both can be used to distract any guards or patrols, causing them to investigate the source of the noise. Alarm clocks can be set to go off at a certain time, ranging from 5 seconds all the way to a full minute. Toy trains can be placed on the ground to generate sound almost immediately, or the can be placed to move forward causing any robots to form a congo line and chase after it.

Thrown items include rocks and empty bottles. As one would expect, you can direct your distraction at a far away location causing any robots to investigate away from you (hopefully). Rocks only take up a single slot, whereas bottles take two slots and are primarily gained by consuming alcohol. Considering the dual function of alcohol/empty bottles, I recommend them over rocks if your inventory isn't too pressed for space.

A somewhat risky way to draw attention is to light a campfire. This can cause robots outside your visual range to converge on your position. Considering how long a fire will burn for, they can draw in more bots than you may be hoping for. Another ill advised but effective means of distraction is to simply fire a few rounds off from whatever gun you happen to be holding. Remember, the bots have to actually see you to give chase, so if you vacate the area quick enough it can work quite well.

Finally, if you find the hilariously named "rusty trombone", you have yourself an infinite use noise maker! Unfortunately, the hunters will home in directly on your position. This item is a very usefull multiplayer item for obvious reasons.
Food and Misc. Items
Food

As previously noted, there are several varieties of food available to your character. The two main catagories you will find foods located in are Edible and Dubious. Although I'm not going full out with a list of every food item in the game, I will make note of which dubious items are edible, and which aren't as well as the different types of alcohol. Note that eating food thats of a poor quality won't actually hurt your character, it will just make your vitality drop.

Dubious Items (Edible)


The main dubious items you can eat are a realtively small number. Cat food is edible, and only restores about 5 vitality. Mushrooms, both white and red, are also edible and restore a much more impressive 20 vitality. Mushrooms can be found both in buildings, and in small patches out in the wild.

White mushrooms are perfectly fine to eat with no adverse effects. Red mushrooms are also fine to eat, but they have a certain side effect to be wary of; they will cause your character to absolutely trip balls after eating them. The effect is similar to being drunk, however its much more disorienting and the onset is much quicker.

Of special note is haggis. It's labeled as green and edible, and it is good for you, but the icon for it may make it look inedible (espeically if you're American). Apples also take on a rather sickly appearance, but are fine to eat.

Dubious Items (Inedible)


By far the most common food stuffs found in buildings are unfortunantely inedible. Unpleaseant eggs and blight ridden spuds will probably be found a majority of the time, and they are both bad for you, draining 20 vitality. Mouldy bread is also bad, but only drops vitality 5 points. Dead rats are also a common item. I think that this should go without saying, but you shouldn't eat a dead rat, neither in game or real life. They will drop your vitality a whoping 50 points in game, and probably give you hepatitus or cancer or something in real life

That Sweet, Sweet Booze

Alcohol is one of the better healing items, if only because it gives you a handy distraction tool after you drink it. Much like real life, alcohol comes in different flavors. Also like real life, too much will get you ♥♥♥♥ hammered drunk. In general, all alcohols seem to give you 50 vitality, which is not bad as far as food stuffs go. The main difference is in how quickly they get you drunk.

  • Local Stout - Requires two to become drunk.
  • Sherry - Instant inebriation
  • Whisky - Instant, harsh inebriation.


Talismans

Talismans were added into the game to give your character some powerful, yet short term abilities. These items are found rarely, and only obtainable from certain loot sources. I've mostly seen them appear in the small shacks that can be found out in fields away from the main towns. The industrial and fens biomes tend to have an abundance of these shacks. (Note that it's the shacks out in the open with a bonfire next to them, not the shacks that appear in wooden copses. The talismans might spawn there as well, I just haven't seen any there yet.)

As follows, here are the talismans I have found thus far:

Invisibility Talisman A blue coloured vodoo doll. This doll causes your character to become invisible for 20 seconds. As per the description, you are only invisible and still make noise, but enemies will absolutely not be able to find you. That includes the ever terrifying Land Owner, who you can walk up to and headbutt his knee if thats what gets your jollies off.

Invincibility Talisman A red coloured vodoo doll. As per the name, this item will give your character temporary invincibility. Really great to use if your cornered or are about to be attacked by something terrible like the bog monster. As with the invisibility Talisman, you get 20 seconds.

Using either talisman creates a small vodoo doll icon that hovers above your main status bar, next to where the bleeding alert itcon appears.

[Thanks to hydra479 & DerailedGears22 for doing the initial legwork for me!]
Your First Game
Upon booting up the game, you have several options available to you. For starters, you should go to the options menu. Set your keys for how they suit you the best, and make sure you're comfortable with the controls. Sir, You Are Being Hunted has more simplistic controls than most FPS games, but it's still good to make sure you know what every key does.

In the graphics settings, I recommend that no matter your system setup, you set your maximum visibility to the highest setting it can possibly be. In a game like this, situational awareness is absolute paramount to your success.

Finally, under the game options tab is the enemy marker check box. This adds little arrows above an enemy’s head that shows you their location and state of awareness. I personally do not recommend this option, as it effectively allows you to cheat and see enemies through walls and terrain. It's not a bad thing to use if you're struggling, or you want to better understand how enemies react to spotting you or distractions, but other than that it really takes the fun and tension out of the game.

A final aside is choosing whether you want the game to be Sir or Madam, You Are Being Hunted, which does nothing more than alter how your butler addresses you in-game. (I assume it alters your multiplayer model as well, but I have not yet tested this)

Character Selection

Upon starting a new game, you get to select your character class. This simply changes your starting items, but it can have a huge impact on your play through. The character classes are as follows;
  • The Aristocrat
  • The Gamekeeper
  • The Inventor
  • The Officer
  • The Cook
  • The Artist
  • The Old Soak
Every single class starts with rags, but that is where the similarities end. The specialty classes start with items that are overall rare finds in the game on a normal playthrough, This also allows you to experiment with some of these items if you fail to find them readily in your main game.

The Aristocrat only comes with rags on his/her person, and is considered the default playing style. In my opinion it is the most rewarding, in that you start with absolutely nothing and have to work for your weapons and food. I highly recommend this class even if it's your first time playing the game, as it will give you a "pure" playing experience.

The Gamekeeper gains early access to traps and pliers in addition to some game meat. He is also the only one who starts with dynamite!

The Inventor starts with a plethora of distraction items and a set of pliers, but the real prize is the scanner that he/she starts with.

The Officer is the only class to not only begin with a weapon, but two! And not only that, but she starts with the revolver and the rifle, both of which are rare finds within the game. Definitely a good class to start with if you have had a rough time survivng in the beginning.

The Cook, unsurprisingly, starts with a good bit of food on their person, as well as a unlimited use box of matches.

The Artist is a bit of a strange start. The main draws to this class are the starting map and the rusty trombone, allowing you to get your bearing early on as well as access to a rather useful distraction tool. Hilariously, you also start with a red mushroom :p

The Old Soak This is a more tragic version of The Cook. You start with more booze on you than you know what to do with. In reality this class is a combination of The Cook and The Inventor, giving you both food and a method of distraction. I like this one because despite the initial benefits, booze is common enough to find that its starting item status has an almost negligible effect on the game in the long run.

Again, I highly suggest starting with the Aristocrat, but the other classes can alleviate the rather high difficulty of the game if the going gets too tough.

World Generation

After selecting a class, you are taken to a world creation screen. I recommend having each island be a different type of biome, not only for variety sake but for getting the full gameplay experience. It's a good idea to try and remember where each island will generate on the map, as once in the game there is no way to tell which island is where unless you feel like taking a boat to each biome until you find the one you were looking for.

With the 1.1 update, you can now edit your world generation quite extensively and can create some truly alien looking worlds if you wish. The option can break the game, so Big Robot have placed an "Advanced World Generation" tick box under the game options menu which must be enabled to allow the editing. You can also change how the robots will spawn into the game, being able to edit spawn time as well as the amount of individual types. You can even remove the robots from the game altogether, but there’s not as much fun in that now, is there?

These are the settings I usually recommend. The main things to note with this setup is that dogs are greatly reduced in number, and the Landowner appears right from the get-go. Personal opinion is that dogs are way to common in late game, making stealth almost a non-option so I keep them down to more manageable levels.
The Archipelago (pt. 1)
Your own private Hell


The picture above shows each type of biome during the world creation part of the game. They may look similar at first, but you can learn to tell the differences by learning the features of each biome. Also, the loading screen actually shows you exactly how each island will physically appear in game!

The world of Sir is made up of a group of five different islands. You can select their biomes at the start and tweak each island's generation. Every biome has its own distinct look, feel, and strategy for navigating it. The different biomes are as follows;
  • Rural
  • Fens
  • Mountain
  • Industrial
  • Castle
Although they are all different and have their own advantages and disadvantages, the enemies, items, and telebits will follow the same basic rules; its up to you to know how to exploit each map to your advantage.

Rural

Ahh, the good ol' rural biome. In my opinion, it has some of the best visual variety in the game. If it weren't for the robots stalking the land, it would be almost idyllic. This biome is essentially the closest thing to a default setting for Sir. The center island will always be rural, but you can also set the outer islands to be this biome if you wish.

The rural biome is representative of a typical British countryside; complete with farmland, rolling hills, quaint villages, and frequent rain.

The farmlands can provide some excellent visual cover from robot patrols, and the hedge row borders can present both a great hiding spot and an escape route. The terrain is mostly flat but occasionally hills will present themselves, offering both good cover and/or a great way to be spotted.

Villages are abundant in this biome, while the occasional manor or church can be found dotted about the landscape. Woodsy clearings can offer some good cover, at least until poachers begin to populate them. One thing about the countryside is you must be careful when crossing the open fields.


They sometimes offer very little in terms of cover, and all it takes is one stray hunter patrol to stumble over you. The occasional lack of terrain variation can make running from hunters very difficult at times, but there are generally enough fields and hedges to dip behind if you find yourself exposed.

A word of caution; as the game progresses, the center island in particular becomes incredibly dangerous. It may just be my play experience, but patrols tend to be larger and more frequent in the center biome towards the end of your play through.

Fens

The Fens region can be one of the more difficult islands you will encounter. Modeled after the real-life fens region, it's mostly swamp and forest with water in great abundance. Water can appear in narrow trenches carved throughout the map, while some areas are completely flooded over. Overall, it has the flattest terrain of any other biome.

Villages can be found, but they are exceedingly rare, and often destroyed. Their often dilapidated state also guarantees some less substantial loot compared to the rural and industrial villages. Due to the waterlogged nature of the Fens, the bog monster can appear in some of the deeper lakes and trenches found on the island.
One good upside to the Fens is the large fields of grass. Grass found here can be incredibly tall, and therefore offer the absolute best stealth bonus in the game, to the point that walking normally can provide a maximum stealth bonus through some areas. Although the robots are easier to see than you yourself, dogs are hidden quite well in the thickets, as are poachers that may wander into the grasslands.

The true difficulty to the fens is in how there is so much less of everything. Less buildings and terrain height means that robots can spot and/or pursue you for great distances. However, you will be able to see them just as well. More than any other region, a little bit of situational awareness will go a long way in ensuring your survival.

Mountains

The mountains biome is, for all intents and purposes, the complete opposite of the fens. Whereas a flat, watery map was The Fens' inspiration, verticality is what the mountains are all about. The map has considerably more height variation than any other biome, and at least one or more mountain peak. In addition to the height, it is the woodsiest region in the game, offering plenty of static cover.

Because of the design of the biome, the view distance can be absolutely massive. Although the hills may provide plenty of cover, do not underestimate the tenacity of the bots. Because of that large view distance that often presents itself, chases can go on for a very long time if one isn't careful.

Another downside with the mountain region to be aware of is the scarcity of buildings. Although manors and pubs may still be found, villages themselves do not appear. Instead, ruined buildings, mountain campsites and massive cathedral skeletons are all that is left of civilization out in these remote parts.
The Archipelago (pt. 2)
Industrial

The Industrial region is the closest thing this game has to an urban map. It's a polluted area, with more buildings on this map than any other in the game! It's certainly one of the easier maps, but you need to rely on your hearing due to all the solid structures obscuring your view. The balloon in particular can become a deadly problem when traversing the main city.

The central focus of the biome is a large canal which cuts through most of the map. The areas surrounding it are covered with buildings on either side, making up the aforementioned city. Bridges cross over at random locations allowing easier access to the other side. Further away from the main city, smaller industrial buildings and villages can be found, along with the occasional church or warehouse.
Sprawling junkyards and stockpiles can also be found dotted throughout the map, offering some awesome vantage points if you manage to clamber up on top of one. As far as terrain variation goes, its very similar to the rural map, with both flat areas and large hills towards the outside areas of the map.

Due to the overabundance of houses, this map makes for an awesome loot hub. Going to it early on can all but guarantee that you will be well stocked for what’s to come. I personally wait until I’ve already conquered one or two islands and use the industrial zone as a restock point, but its really all about how you want to go about it yourself.

Castle

The Castle biome is an in-between point of the rural and industrial biomes. Although it does have an abundance of villages and manors, it doesn't have any central cities like the Industrial biome. The key features of the castle biome are the (wait for it...) castles! These rather large landmarks dot the landscape in random plots. Ruined walls and building foundations can be found scattered around the center of the island, while castle courtyards are also a commonly seen feature.


Although the castles and towers are not lootable, they are great for protection, and most of them can actually be scaled. Some of the towers can even be entered, and you can climb the stairs to the top! (disclaimer: some jumping required) Although the mountains had plenty of verticality with the terrain, the castle biome introduces verticality from the structures within.
Weapons
Arm Thy Self!

Despite all the stealthing around you do, combat always has a chance of occuring. When things get violent, a weapon can be the difference between walking away to freedom, or staring at the loading screen. Sir has a few different weapons available for you to scavenge.

Although weapons do not break or degrade over time, the chances of finding an actual working weapon are unfortunately slim. While it is possible to never find a weapon in a play through, it's more than likely you will find at least some form of defense to keep your pursuers at bay.

I am a firm believer in there being no such thing as an ineffective weapon. They all have their upsides and downsides no matter how you swing it, so it really all comes down to personal taste (and luck of the draw) for how you want to use your limited inventory space.

Weapons range from the simple but effective axe, all the way up to the devastating blunderbuss;


  • Felling Axe: For many players, this is the only weapon worth carrying. It has unlimited ammo, can kill quickly, and seems to be found easily. Being the only melee weapon in a game with scarce ammo, its more than likely going to see its fair share of combat.

    It takes two hits to bring down your average hunter bot, but with the right skill this will be a simple chore. It obviously loses some effectiveness against fast enemies like dogs or powerhouses like poachers, but for run-of-the-mill hunters it's invaluable. It's only real downside is that it has a tendency to break weapons on enemy bots, leaving their precious ammo un-scavangeable.


  • Revolver: Despite the diminutive size, this weapon packs a punch. As the fastest firing weapon, the revolver should not be taken lightly. Ammo for it can, on occasion, be quite plentiful. The revolver is best used at a medium range, where the weapon is still accurate, but its damage potential isn't squandered. It fires continuously if the trigger is held down, making it a capable weapon for larger groups of hunters. It's also the only gun that can be fired while sprinting. The biggest downsides to this weapon are the incredibly long reload times and its' relatively underpowered bullets. It can sometimes be hard to find, unless you go squire hunting.


  • Shotgun: Without a doubt, this is the most common weapon you will find in the game. Every hunter is equipped with one, and despite its weakness at range it can one shot most hunters up close. If there is to be one fault with the shotgun, other than range, it's the bleedin' ammo. Each clip is two shots, therefore each inventory slot is only two shots. To have any decent amount of ammo requires substantial inventory space.


  • Rifle: Ahh, the ever reliable rifle. This weapon is absurdly powerful, ammo efficient, and has a seemingly unlimited range. The biggest downside? Unless you start with the weapon, it is only obtainable from loot sources, because no enemy in the game (thankfully) carries it on their person! The rifle's range allows it to pick off lone hunters from a safe distance. Although the single shot reload takes some getting used too, its a fantastic weapon for almost every encounter. The ammo may take up two slots, but at 10 shots per stack it's more than worth it to carry some.


  • Blunderbuss; This is a personal favorite of mine. While the blunderbuss may not have such trivial things as ammo efficiency (at two inventory slots per shot), fast reload time (around 4 to 5 seconds) or range, it more than makes up for it with ball shriveling power.

    Being a shotgun based weapon, it's maximum effective range is a bit lacking. But it can and probably will take out several targets at once if they group up together. It's found on dead poachers (Found it once in a building, but only once) and even then, it is a rare chance for it to be intact. Coupled with the similarly rare and space consuming ammo, it is inefficiency to the max. But good god does it feel satisfying.

  • Traps are used to immobilize their victims, whether they be enemy bots or the player themselves. In my opinion, they are a bit finicky, as the target has to directly walk over the trap. However, any bots caught will remain immobile for a long stretch of time, allowing you to dispose of them easily or escape. The main benefit to traps is they can be reused if a pair of pliers is on hand. The pliers can also be used infinitely.


    Dynamite is a rarely found but incredibly useful means of attack. The explosion radius can take out multiple targets (including yourself) if they group close enough. Due to this, it is best to combine dynamite with a distraction item like the train or clock, drawing in as many enemies as you can before throwing a stick. It will explode after a fuse lasting about 4 to 5 seconds.
Enemies (pt.1)
One of the main draws of Sir, You Are Being Hunted is its varied and original cast of robotic enemies. One important thing to remember is that almost every single enemy can kill you very quickly. Those that don't often serve to alert and attract enemies that can actually kill you.

All enemies follow a basic set of rules; they will either wander around the countryside looking for the player, or guard and patrol around any points of interest they come across (houses, towns and telebits). Should they spot him or her, they will begin to pursue the player, both attacking with a weapon and alerting any other nearby robots. Most enemies will make noise to alert you to their position, but only while they're moving. Whilst standing still, they are silent unless they talk amongst or to themselves. The special enemies in the game will play with these standard rules, modifying or even breaking them in some ways. Figuring out how to adapt to these rule changes is all part of the fun of the game!

As the game progresses, more diverse types of robots are released into the game. The pacing is controlled by how many pieces you have picked up, as well as how much time has passed. There are milestones that control the next release of enemies for both events, and the game will go with whichever condition has been met first (as an example, an hour has passed but you only have 3 pieces. The game will up the difficulty based on the time in this case.) You will always start with only hunters and the balloon prowling around for you. Dogs, squires and the landowner are released around the same time, if not all at once. This is usually half way through your first island if you clear out the center island first. Then the poachers and scarecrows will make their appearance. Finally, the rider is the last enemy to spawn.

Hunters

Your standard, run-of-the-mill hunter bot. They will be among the first enemies you will see, and will often be the most threatening to your survival. Armed with shotguns, hunters need to close the distance before they can do any concerning damage. They will be found patrolling around the island either solo, or in groups of up to four.

As some of the most expressive enemies you encounter, hunters can be found doing a variety of things while they search for the player. As they patrol, they are known to stop to take a tea break and show off their...err, trophies while having idle chit-chat with each other. Hunters are prone to infighting, and occasionally a gun battle can occur without your intervention. This can be a great opportunity to grab some additional ammunition or even a gun if you don't have one.

A single hunter can end your life quickly, especially if you don't know how to deal with them. Although they can be accurate with their guns, they have a hard time hitting a strafing target, and an axe will end them quickly.

Be aware that although one or even two hunters are not too much of a problem when you know how to take them down, any more than four can quickly cut you down in their cross fire.

Dogs

Dogs are companions to hunters. Their small size coupled with their fast speed make them harder to run from or take down, and their keen senses make approaching accompanying groups more difficult. When a dog spots you, they will begin to bark along with emmiting a beeping sound, to help the player differentiate between normal dog barking and alerted dog barking. They also tend to emit a near constant growling noise when they start to suspect the player may be nearby.

Dogs really don't do a whole lot of damage. Their main purpose is to pin you down, allowing hunters to catch up to you. They do, however, have a high chance of inflicting the bleeding status on you. They are the weakest enemies, going down with one revolver shot, but they do not carry any loot what so ever. They attack with hit and run tactics, often running away as fast as they can after attacking you, waiting a few seconds before going back in for another attack run.

If you should kill a dog's master, they will flee to find another robot to adopt them if they have just completed an attack run, otherwise they will go in for one last bite. Very rarely, you may find dogs guarding a particular spot alone. Other times, they will spawn far away from their master and run at full speed to get to them.


Bog Monster

Not an enemy in the standard sense, the bog monster is basically a border patrol, keeping the player on the mainland and away from the edge of the map. It can be seen occasionally popping up in the distance, even if the player is nowhere near the water.

Although they have the same appearance, there are technically two different bog monsters. One is simply a visual entity, and is completely harmless even if you swim out and touch it. It just serves as some menacing scenery. The other is more than lethal and can kill you soooooo quickly.

The first time the actual monster appears, it is harmless and simply acts as a warning, letting the player know its time to get out of the water. The second time it will attack if the player remains nearby. Even if you stay clear of the water, it can be a threat if you are trying to skirt along the coast. In addition to a long range, the bog monster will actually begin to physically chase you down, often making it a lethal threat.

Two bog monsters can appear if the ambient monster is active and the warning/attack monster also spawns. The best way to tell if the monster in question is a warning or a scenic object is to look at the water after it retreats back under. If there is a large spray of water jetting out, then its the warning monster and the next appearance will be lethal. If not, then it’s just all part of the scenery folks!

Balloon

The sentry balloon floats about the countryside on a random movement path, sweeping a spotlight underneath it. Should you be caught in the light, it sounds an alarm that draws in what I can only assume to be every single robot on the island. It's invincible (sorta), completely silent, and can creep up on you way more easily than you would think. Although it has a random movement pattern, it actually follows the player somewhat, moving towards them if they get too far out of its range.

Obviously the best way to avoid the balloon is to simply look up. Because of this, villages or tall trees will actually conceal it quite well. It can only see you if you are in range of its light. It’s actually possible to shoot out the light, although it will repair itself quickly. Finally, the light itself is sensitive to sound. It will focus on any sound sources such as thrown bottles or alarm clocks. This also means that sprinting underneath the balloon is a very bad idea.
Enemies (pt. 2)
Scarecrow

A rather odd fellow, the scarecrow shows up in the later stages of the game. It stays rooted in one spot while inactive, swaying with the wind. Should you cross into its line of sight, however, it activates.

The scarecrow does no damage at all, but it can kill a player very quickly. It acts as a mobile alarm, pulling a Slenderman and continuously teleporting behind the player should they look away from it and calling robots to its location constantly. It often spawns in fields, and players are generally unaware of it until they hear its creepy voice behind them. Although it can be killed, it is an absolute tank; shooting it is effective but a waste of ammo, while using the axe can take up to 8(!) swings, which is far too long of a time before the patrols start to close in.

The best way to deal with it is to keep line of sight and back away until its eyes turn off, usually about 20 feet away. Remember that you can't outrun this particular enemy, as it will always be right behind you until you deal with it! They will always drop a pumpkin, which can be eaten, and some books, which can be read for funsies. Thankfully, they don't seem to appear in mountain biomes.

The Rider

Considered by many to be the one of the greatest threats, the rider is one of the last enemies to appear. They roam about on rocket powered horses that somehow continue to make a clomping sound. They are both easy to spot and hear, due to the light and noise created by the rocket engines.

When spotted by a rider, they sound a horn that alerts other robots, and run you over at high speed with their horse. This attack immobilizes you for a few seconds, giving other hunters time to shoot you and allowing the rider to reposition for another pass. However despite their heavy duty appearance, they have less health than one would think, going down with a few hits of the shotgun. They are nearly impossible to run away from, although buildings can, on occasion, give the A.I. some trouble following you. They only seem to spawn in rural biomes and the fens.

The Poacher

This short little weirdo hangs out around the various copses litered about the landscape. He is very territorial and won't wander far from his little tree clump, even if he should spot you. He constantly patrols around his camp, humming to himself. Every once in a while, he will stop to lay down a trap. What makes him so deadly is that, in combination with these immobilizing traps, he carries a blunderbuss around.

The poacher seems to be designed to keep you out in the open more during the later stages of the game. He's easy to spot, makes a lot of unique noises, and when you learn what type of scenery he spawns in, he can be avoided completely. Coupled with his limited chase range, he's more of an obstacle than anything. Should he actually engage you in combat, though, his blunderbuss is almost a guaranteed one hit kill if he lands a hit. Most of the time he is fought is when players try to obtain his blunderbuss. The rifle or revolver can make quick work of him from a safe range.

The real threat of the poacher becomes obvious when you have to navigate through his territory. Always keep an eye out for the traps he lays down, and don't let him spot you if you're low on ammo or unarmed. He will also engage his fellow robots for sport as well as you, so a poacher thicket can make for an interesting hiding place if you stay clear of the poacher himself.

The Squire

This tubby buddy will usually be found around towns. He meanders about, humming songs and commenting on the "lovely" weather, and just generally being a jolly ol' chap. He is neutral and will let you go about your business. However, god help you if you loot one of his buildings while he's watching. The squire has a lot of health to go with his girth, and he can unload the revolver he carries with surprising speed. For a fun time, you can trick hunters into attacking him and he'll unleash his fury on them, usually killing them if they are distracted with trying to kill you.

He can be taken out with ease using an axe and circle strafing him while he's neutral and unaware of your murderous intent. Rather hilariously, he takes so long to turn around that he may never draw his gun on you if you keep to his backside while attacking. He has a good chance of dropping maps in addition to the obvious loot, including his revolver.


The Landowner

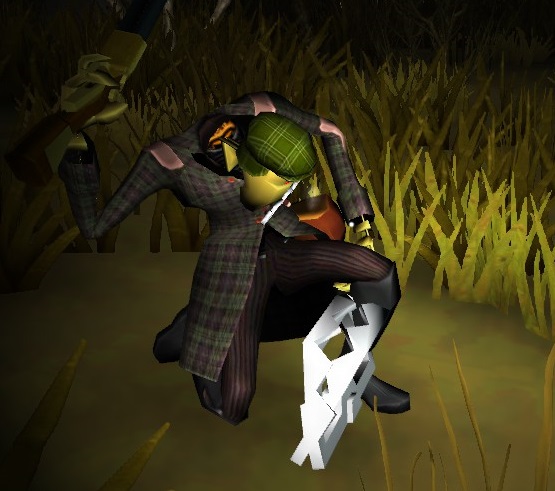
Behold, the dapper face of true terror...The landowner is quite a unique enemy IMO. His behavior is much like the balloon; he's invincible and only one spawns to wander about the countryside trying to spot you. When the landowner spots you, however, there is so much NOPE involved. Basically, he's like the curse from It Follows in terrifying enormous robot form; he will begin to head towards you at a steady pace no matter where on the island you go and he will NEVER lose sight of you. And no, you can't bang another robot and pass his wrath on to it instead of you.

Should he catch you, he hits the ground with his cane to stun you, and then finishes you off with a stab. It’s made all the more terrifying when you hear the sounds he makes. In addition, he emits a low pitched humming which increases in volume as you near him. Be aware that if he stops moving, he is COMPLETELY SILENT, but it is not often that he will do so.

He's always accompanied by two dogs, so sneaking by him can be difficult. Thankfully he's next to impossible to miss. However, if you're distracted or in a prolonged firefight, he can creep up on you and make matters much worse. He has a relatively acute sense of awarness once you are in range, as well. Even if he spots you, it’s not the end of the world (or your life) and he can in fact make for an interesting challenge. When being stalked by the landowner, he adds a sort of time limit to everything, which can be detrimental or more fun, depending on your mindset. The only way to get the landowner to stop following you is to leave the island!
The Game Plan
As I have mentioned before, I highly recommend that when you create your world, you have each of the five islands enabled. This will not only provide you with variety, but it will give you a good strategy to follow as to where you should venture first.

This "walkthrough" assumes that you are using all 5 of the island types and leaving the enemy spawn times as the default (although I find it ideal to tone down dogs to match the hunters spawn levels. They REALLY like to throw them at you late game) The following is the course of action I usually take when I play;

1) After starting the game and clearing out the standing stones, I immediately head to the nearest lootable structure; patrols are practically non exsistant for the first few minutes of the game, and those precious few minutes should be used to try and find a weapon of some sort and as much food and/or distraction items you can locate and carry. If you see any telebits, grab them! The central island telebits are absolutely HUGE in comparison to the other islands telebits, and with an empty inventory it's much less of a hassle to transport them to the standing stones in the beggining. HOWEVER, I recommend leaving at least one bit behind, or you will accelerate the enemy spawn significantly.

2) Once you have some basic supplies and some (or all) of the telebits packed away safely at the standing stones, make your way to the Fens region. The reason being that the fens is, in my opinion, the most dangerous biome when you enter the late game. The flat terrain all but ensures you will be caught if you run across open ground, and it's one of the few external islands that spawns riders. After arriving, the land owner should have, or will soon be spawning into the game. at this stage he's the most imposing threat you can face. Dogs will also spawn in at or around the same time. Once I get all the telebits, I get the eff outta dodge as soon as possible and make my way back to the mainland.

3) At this point, I like to deposit the stones ASAP and then go on a small loot run depending on my supplies. Hopefully by now you will have found a weapon of some sort, because it will only get harder from here on out. At this point I'll usually try and grab the final telebit piece on the central island and begin to make my way towards the next boat.

4) After the deposit, it's time to hit the restock point; the Industrial island. This is a biome where it's good to take your time. Make getting a weapon a priority if you haven't found one yet. Search as many houses you can, and don't forget to check both the front AND back doors!! The large factory buildings exclusive to this region often contain copius amounts of loot, including dynamite. The shacks found outside the city will usually contain a vodoo doll, in addition to the chance for more dynamite.

5) The mountains is one of those biomes that is either a breeze or a nightmare, depending on how well you stay hidden. Chases can last for a VERY long time here if you're not careful. There are usually at least one or two pubs in the mountains, which means that you're all but guaranted the rifle or a revolver if you've been unlucky thus far. Scarecrows should have started appearing by now, but they won't spawn in the mountains thankfully. However, poachers will be out in force, The mountains are densly populated with the copses that poachers like to hang out in, but they can be seen from far away and at the very least avoided.

6) At this point, the central island should be bustling with activity by now, making it very dangerous to be out in the open for too long. Riders should have spawned in by now, and the patrols will be up to 5 bots with acompanying dogs. Drop the pieces off as fast as you can and make for the final island; the castle biome. Not much else should be different from the central island, just clear it as fast as you can and book it back to the boat!

7) Now you'll be up againt the full army of bots standing between you and the stones. Although the end should be in sight, take your time and carefully make your way to the stones. Patrols will be literally everywhere, and a balloon sighting will probably mean the death of you. Riders are especially deadly and must be accounted for at all times while crossing the fields. If you managed to forget a piece, it can be VERY hard to salavage the situation this late in the game.
Addendum
I'm pretty much declaring this guide completed. This isn't a game you can really provide a "walkthrough" for due to its random and unscripted nature, so I will simply leave you with the knowledge I have given you to formulate your own strategy, in addition to the one I have outlined for you above. If for any reason the developers add new content, I will do my best to incorporate it into this guide.

If you have any questions, simply ask in the comments box. I'm usually on Steam at least once per day, and I'll do my best to add any additional info that is either missing, or recently discovered by you fine people.

This is an amazing game, and in my opinion it was a resounding success, despite some unfortunate reviews by people that simply didn't "get it". Very few games will offer such a unique experience, much less with such an original cast of characters and setting; I highly recommend Sir to anyone who may be on the fence about purchasing it. This is an indie game done right, and I hope that there will be more to follow.
121 Comments
Bobo's Banana Business 22 Jun, 2024 @ 8:24pm 
I found that you get a compass that leads straight to the stone circle, but the robots are a different story. Honestly, they don't need any bloodhounds; they just have them there for good measure. They're more than powerful enough that they really don't need them.

They have this god-like acuity that feels supernatural, even by this game's standards; I can't tell you how many times they catch me in tall grass, even when it should be impossible for them to do that, especially when I do my best to never draw attention to myself.

Their victory over me feels unbalanced; it's like they don't need to put much effort into finding you. This is especially frustrating when they can typically cancel you in like two to three decent shots, and with a group hunting you as they often travel in packs, they can kill you very quickly.
Best Boi 22 Jun, 2024 @ 8:29am 
The beginning landmark is marked with an empty circle on the compass, the boats also have different markers.
Bobo's Banana Business 3 Apr, 2024 @ 4:36pm 
The place you load in is often easy to lose. I'll wander too far in search of telebits and lose my way back to where I need to be. There has to be an easier way to find that beginning landmark.

Also, from my unfortunate experience, the hunters can spot you from a fair distance away (I learned that the hard way)
Lud1crous 28 Mar, 2022 @ 4:36pm 
who else came here for jammy dodgers and a pot of tea?
fing click bated:steamfacepalm:
Bigchicken 1 Dec, 2020 @ 5:53pm 
You can mark your stashes on the map, I found it very helpful to stash all my extra ammo and neat finds at a marked safe house.

You could also store the crystals here too, although then more enemies wouldn't spawn and it would be anti fun
Pablo Pegaso 15 Jun, 2020 @ 8:24pm 
Thanks :) Loved the game
Thorn-Exile 19 Apr, 2020 @ 7:03am 
Awsome ! thank you!
The Rabid Otter 21 Apr, 2019 @ 6:13pm 
Thank you for the cleverly-written guide.
Adiday 6 Feb, 2019 @ 4:42pm 
Great guide thank you! I want to play again now!
headmonkeyboy 27 Oct, 2018 @ 5:15pm 
I thank you Sir for the best guide I've read on steam, now for my fighting trousers, a brown tea, and Im off... https://www.youtube.com/watch?v=0iRTB-FTMdk&list=RD0iRTB-FTMdk&index=1