Defense Grid: The Awakening

Defense Grid: The Awakening

506 ratings
Aussiedroid's DG Tower Guide
By Aussiedroid
DG Tower Tips 'n' Tactics resource for new-comers and existing players wanting to improve their game ...

There's no right or wrong way to play Defense Grid; each level can be done with many strategies using many different towers combinations and paths. Finding these and experimenting is one of the most engaging and fun aspects of DG; the information below is designed to put you on the 'not so Hidden :p' path to learn to achieve Gold!

2
2
12
   
Award
Favorite
Favorited
Unfavorite
How Does This All Work? (The Basics)


Each of the 10 towers in Defense Grid you can choose from will have its own strengths & weaknesses. The balance of these, along with your placement will determine the success of your level.

Selection will also depend on the combination or ‘make up’ of the Alien hordes coming your direction. Are they flying units, are they fast runners or in large swarms. Maybe there are lots of shielded units or are they just mainly medium or large size units?

All Aliens will have the optimal tower choice to maximize your damage output (DPS).

Towers fall into 3 categories: Standard Damage, Area Damage & Special towers (more details below).

You can upgrade all of the towers for resources you have earned, which will improve the damage, range or rate of fire depending on the tower type. All towers begin as Green (Level 1) but can be upgraded to Yellow (Level 2) & then finally Red (Level 3) for maximum output.

Upgrading will cost you more than a new tower, but will give you a bigger bonus as a reward. For example the Gun tower when upgraded will approximately scale as:


Tower Level
Colour
Bonus Damage
Level 1
x1 damage
Level 2
x3 damage
Level 3
x7 damage


Balancing when to spread out & when to upgrade is a key element of success in Defense Grid.
Mounting Your Defense
You have a clean map and resources to spend, but where should I start building and what should I build? This is a tough one to answer, its like .. how long is a piece of string!

You will start with limited resources and smaller waves of Aliens which will limit what you can do, but there are techniques you are utilise to get the maximum control in each level and the maximum damage output.


Choke Points | Killzones

'It's Wall to Wall in here!'

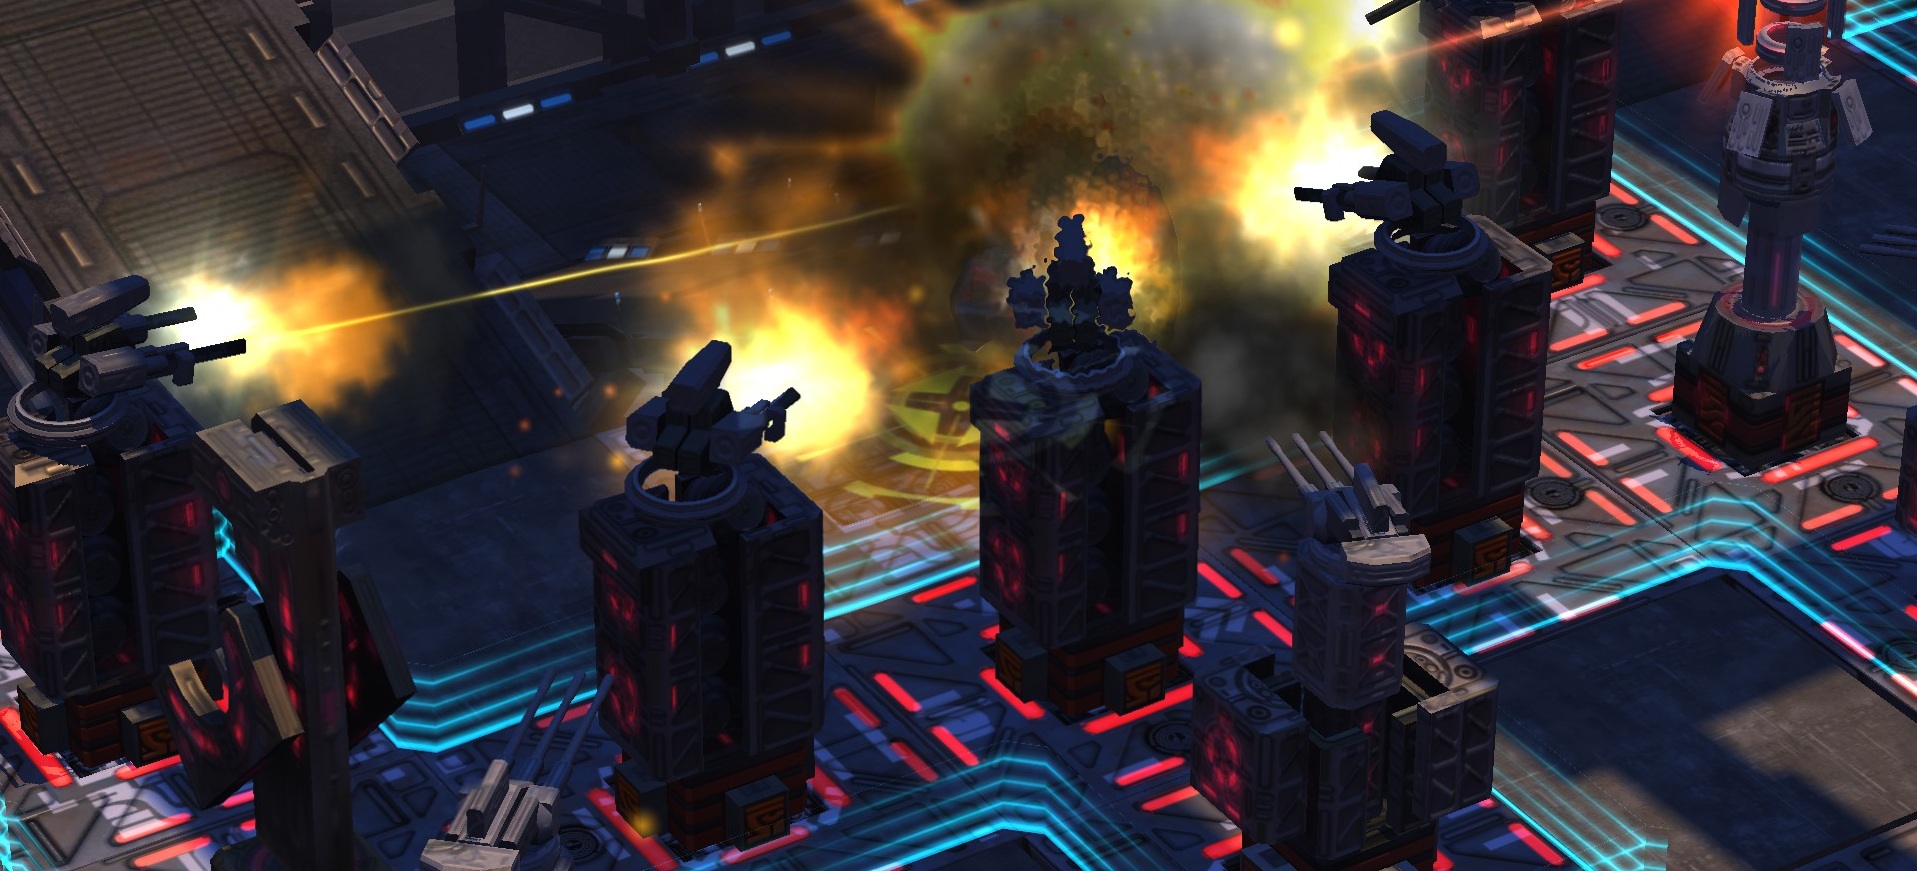
The most important technique to master to really squeeze damage out of limited resources. When used successfully it will create a hotspot where you can slow down the Aliens, having the most Level 3 towers firing, in turn more damage for less resources spent.

Ideally, place them where Aliens will pass multiple times to the cores (& back) - in range of your choke points' damage zone. On open maps, this is generally be achieved later in the waves but can leverage off maps natural choke point(s).

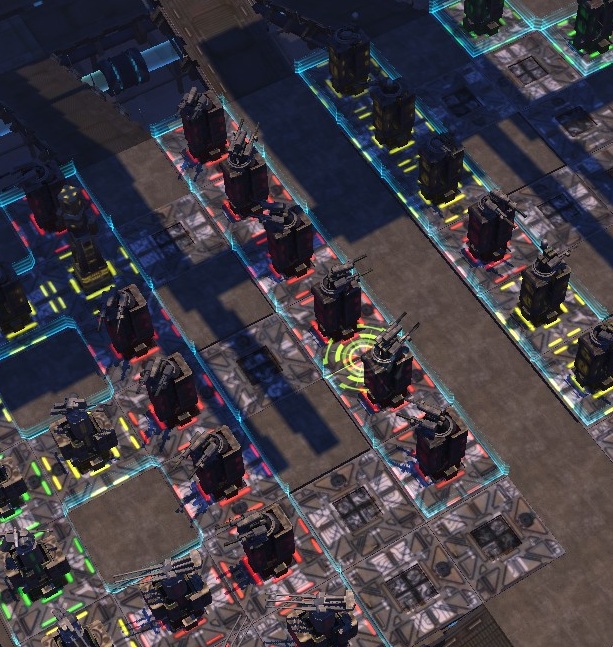
Every Choke Point you create will generally include a range of Level 3 towers, with a number of Guns, Temporal & Command coverage, Concussion (or two) and a combination of other towers depending on your needs - all in range and line of sight to a central point or path.

Where Air waves present its always good to create the Choke Point over the flight path to help cut down the Air waves with your Guns & Cannons.

As previously explained, building up is more damage effective than building out (although combination of both is generally needed).

Example Choke Points / Killzones:
............................'It's a Trap!'..............................


Where to Start Building

It will vary greatly by map, starting resources etc, but often its best to go safe and go guns starting your build followed by a roll-out of other tower types as needed.

There are also some considerations when it comes to positioning your build:
  • Study your Map - there are generally a few key squares which, when blocked, create the 'key path' for the Aliens. This will give you time to create a Choke point or longer path without spending too much resources initially.

  • Multiple entry points and multiple exits can be easier to manage near the cores, create a Choke Point and work your way forward;
    Defense is the best Offense.

  • Multiple entry points and single exit. If the map allows, create path funneling both entries to a common Choke point with the plan to kill them before hitting the cores;
    Offense is the best Defense.

  • Grind them Down? This approach focuses more on path creation spreading your Level 1 Gun towers widely. Generally lower damage than concentrated approach but long trip to cores can negate some of this. This can buy you time when you need to upgrade or increase your towers to stop the Aliens escaping!

  • Larger maps may be hard to control from the front initially - you know where they are all heading though ... build near cores but remember to build strong!

  • Find Natural Choke Points - Don't always assume creating a long path (Grind them Down) is the best strategy for larger maps. If the aliens can be kept in a map's Natural Choke Point for an extended time then try a build from that point with high damage towers. This may include areas that have two or more pre-existing paths already going past a central point or may be a location where you can use Elevation &/or Line of Sight (See Section below) of the map to your advantage. (Thx BoInGyman_™)

Try to create a long path that doubles back on itself past your strongest towers, increasing the damage output and time to the core.

Temporal & Command towers are good to get out early-ish but not too early; resources on first few waves are best spent in damage towers till you have the Aliens in control.

If you are struggling, try a different path &/or tower &/or upgrade combination. Be creative!
Tower Features: Standard Towers
These are your conventional 'Point-and-Shoot' type towers.

They target only one single Alien at a time.


Gun Tower


All Rounder | Cost Effective | Medium Range.

Best choice for creating paths/blocking access, also good DPS vs. Cost. Recommend upgrading a few to Red earlier in waves to control the level and also for early air raids. Can suffer from Line of Sight and Elevation issues because to maximise the damage the Guns do need to constantly be in sight of the Aliens.

They will generally be the most common baseline tower for your defense. Good against Shielded units as well.

Weak Vs. None.


Laser Tower


Strong Vs. Fast Units | Damage Over Time | Medium Range

Small, fast units beware! These towers are able to target very quickly & slice through them, and bonus it will also continue to burn them once out of range! The DoT effect will continue to burn them for around 5 seconds once out of range with good damage output.

Lasers will also do among the highest damage against Medium & Large targets as long as they don’t have a Shield. Recommend to use in conjunction with Guns/Cannons and some well placed Teslas to negate shield limitations and cover Air units as Laser will not target these.

Also recommended to space out your Laser towers to allow the DoT effect to consistently damage the Aliens. This can be more effective than a group of Laser towers as their DoT doesnt stack.

Expensive to upgrade but high damage at max level.

Weak Vs. Shielded Units.


Cannon Tower


All Rounder | Minimal Line of Sight Issues | Long Range

Unlike some towers, Cannons do not suffer greatly from Line of Sight or Elevation issues when targetting the Aliens due to a longer cooldown with firing rates. This means you can place further away from your Aliens path & output good damage. The turning rate and fire rates are slower than the Gun Towers and can struggle against fast units or units that are at close range as a result.

It cannot hit targets within 1 square of the tower, so don't place them on your path.

Costing double that of the Gun tower you do get the benefit of approximately double the range. Strategically placed, these towers can continue to damage Aliens for a long portion of the Aliens trip to your cores often resulting in it being more cost effective for the damage output over Guns. Due to the larger range radius, Cannons are very effective against Air units. Strong overall and considered by many to be one of the best towers in the game.

Weak Vs. Fast Units


Tesla Tower


Strong Vs. Large Aliens & Shields | Chain Attack | Short Range

Often underestimated and misunderstood, a group of 3-4 placed together do considerable damage against large Aliens. For smaller Aliens their attack also ‘chains’ across nearby Aliens resulting in some bonus damage, albeit minimal.

The Chain Attack will increase by one each upgrade level to max of three.

Tesla Towers also offer 2x damage vs. Shield Units compared to Gun Towers. Use this to your advantage and combine these with Laser Towers placed after the Teslas to maximise damage output.

Tesla's damage increases over time as they charge up between attacks – Longer without firing the better! Each charge increase results in 1.5x damage which can stack resulting in first strike doing considerable damage. Each charge level takes 2.75 seconds, with up to 4 charge levels for a green tower. Charge level increases by 1 for each upgrade in Level to a maximum of 6 charge levels.

It is important to appreciate that getting a Tesla to full charge generally will only occur between waves so this extra damage should really be considered a bonus, hence maximising rate of fire in Temporal locations is key to using effectively.

Selective use is the best approach with these towers, so make note of the level & if you are getting sizable waves of large Aliens put a few of these in generally at the start of a Choke Point is best.

Weak Vs. Small Aliens

Tower Features: Area Damage Towers

Area of Effect (AoE) towers cause damage to multiple targets at once.

They can also continue to damage Aliens when out of range (DoT).

Helps control swarms of small Aliens.


Inferno Tower


Swarm Control | Damage Over Time | Short Range.

A couple well placed Infernos can greatly assist with the small yet great in number swarms that try to push through your lines. Best placed at end of rows or inside turn squares as can suffer from Line of Sight issues.

Infernos can deal out damage to multiple targets at once, and will also cause some Damage over Time (DoT) when out of range as they continue to burn! This DoT is 50% less than Laser towers but can damage Shielded units.

When attacking multiple targets the Inferno can do more damage than a Gun tower, but less Vs. a single target.

Weak Vs. Large Aliens & Shields


Concussion Tower


Swarm Control | Damage Booster | Short Range

Concussion towers are a great damage booster in choke points and Temporal areas. They do an awesome job in thinning out swarms of Aliens, and in turn assist other single targetting towers to mow through the crowd. Will damage the largest number of Aliens at once out of all towers.

Recommend positioning in the middle of a choke point, where Aliens need to travel around the tower. This will maximise the time within its short range.

Can be positioned behind other towers as doesn’t suffer from Line of Sight issues.

Concussion also will provide solid damage against invisible enemies, where other towers that require direct targetting will not. (Thx Liro Raeriyo!)

Their effect can be increased with multiple Concussion towers, making the effectiveness of your choke points turn to pure carnage! For this benefit, it will cost you being the most expensive tower in the game.

Weak Vs. Single & Large Aliens


Meteor Tower


Swarm Control | Slow & Powerful | Long Range

Due to the extreme range of these towers, it allows you flexible placement on squares you wouldn't use for other towers. A small group of well placed (and upgraded) Meteors can make a huge difference to the success of your level. They are expensive to upgrade, only Concussion costing more so limit the number you use early on.

Maps often have elevated squares or central squares to place Meteors that give it almost total range over the Aliens. One or two Meteors centrally placed early in the game can also prove effective when you have limited towers up or a large open area to cover.

It does fire slowly and due to its lobbing action takes a short time before causing damage, but when it hits, the entire area is bombed with 'Area of Effect' damage. It will suffer targetting Aliens at close range, so take advantage of its uber firing range!

It will not target Aliens within a 2 square radius of the tower.

Weak Vs. Fast Aliens & Single Aliens
Tower Features: Special Towers

Specialised & unique support towers which serve a specific role.


Temporal Tower


Area of Effect | Slows Aliens | Medium Range

The unique feature of this tower is its ability to slow down the Aliens. The flow on benefit, when placing these near high damage areas is a boost in damage output as the Aliens will be in range longer; hence towers have more time to grind them to dust!

They work in bursts, which are more effective when upgraded but some overlap with your placement can be beneficial. This ensures if one Temporal misses then the next also in range will hit, keeping the Alien at snail’s pace for longer. Also upgrade to Red as soon as you can; upgrading cost doesn't escalate. These towers are key to max damage output; recommend putting these in when you have some towers at Yellow or higher, or you get a lot of fast Aliens early.

Always have as much of your Aliens path covered by Temporals to maximize the damage output across the entire map.

Weak Vs. None


Command Tower


Area of Effect | Resource Booster | Medium Range

Place these near your choke points & higher damage areas (ie Red Towers). Each Alien killed in range will provide a resource bonus giving you more to spend on upgrades & ultimately resulting in a higher score. The resource bonus increases each upgrade level (25%->35%->45%), so get these to Red as soon as possible and get them out early in your build to get the best scores!

As with the Temporal Towers, Command Towers cost does not escalate per upgrade level.

No stacking benefit in overlapping towers so strategic placement is key to minimise how many you need.

Command also reveals Stealthed units and are vital to ensuring those 'invisible' units don't sneak past.

Weak Vs. None


Missile Tower


Air Defense | Long Range

Specialised tower designed only for Air units (cannot target Ground units). Only a couple of these are needed for majority of levels & can be substituted by Gun/Cannon towers. Be warned though, if your Gun/Cannon towers are attacking ground units they risk letting the Air units past.

Recommend placement closest to entry point of Air units, or where multiple flight paths overlap.

You may also sell these after your last Air waves to regain some resources.

Weak Vs. Ground Units

Advanced: Line of Sight & Elevation

So now you have your head around the variety of towers & how to use them effectively, what next? Well there are a few more things to consider...


Line of Sight (LoS)

With the Standard damage towers, these primarily need to 'see' the Alien in order to damage them. This is what is meant by Line of Sight.

This means placing a Gun Tower behind an Inferno Tower at equal altitude will limit the 'window of opportunity' it can fire on the Alien; in-turn reducing its damage output (You can see this visually as the towers start & stop firing). The Alien may be within range, but is blocked by the tower in front.

Rule of Thumb: Guns, Infernos, Lasers at front with other towers positioned around/behind these.

Cannon Tower is the exception to the rule when it comes to Standard damage towers LoS as its firing rate negates much of this impact unlike Guns that need to fire constantly to maximise damage. Note: It will suffer from some LoS issues but due to the cooldown the can shoot the instant LoS is available meaning it doesn't miss out on as much damage output.

Concussion doesn't suffer from LoS issues, but does have short range - this often means Concussion placed on front row with the other LoS impacted towers. Same tactic for Temporal & Command towers can be used to maximise the range of effect of the tower.

Infernos work best at end of a row or on a turn.

Guns & Lasers well suited to middle of rows due to good tracking speeds.


Tower Elevation

Often easy to overlook, but pretty much every map has squares at different altitudes which can be used to your advantage to increase the effective range of your towers.

The Elevation of the map can be used to allow towers behind others to fire at Aliens more often as they are not blocked by the tower in front. Can also eleviate other LoS issues where the terrain may be blocking attacks.

Cannon towers perform excellently perched above the warzone allowing them to fire almost non-stop. They also target almost directly below their location when split level.


Meteors & Missle towers also benefit from higher locations - choose these where you can.

Careful placement of Temporals, Command & Concussion towers can also reach Aliens on higher levels often doubling up on effectivness for the single tower. (Test this with Temporal or Concussion and see its effect.) Remember the range of attack isn't 2D but more like a cylindrical bubble going out from the center of the tower both over and underneath.

Infernos struggle hitting anything at different level to its placement, and some areas due to elevation do limit the Guns & Lasers effectiveness.

When in doubt remember higher is better :)

Advanced: Maximising Your Score

Eventually, you will start to master all of the levels in Defense Grid get all the Gold .. but one thing always remains ... a better score!

And besides, we all need to beat our friends' scores :)


The best scores will come down to resource management & effective strategy.

This will mean placing the right towers in the right locations and timely upgrades to control the Alien onslaught. With an inefficient strategy you will find you will over-spend on towers & upgrades and have to compensate ongoing to maintain victory which will inevitably lead to a lower score.


Some score specific tips & tactics:

  • You only get interest when your cores are in their housing. Stopping the Aliens getting any cores out on the 'road' is imperative.

  • Don't use your Orbital Strike. You lose valuable resources from the kills.


  • Start the Onslaught Early - At Start of the game, either press Right Mouse Button or 'X' on your XBox controller to start the first wave. Normally, you get a small window (5-15 secs) where the Aliens are still travelling to the map. This accumulate more interest to start things off .. wait to build as long as you can. (Thanks Sarkazo)

  • Upgrade only when you need and not as soon as you get resources. Often as soon as resources are available my finger is on the trigger to upgrade or place something new. The longer you can resist & wait the more interest on your resources you get. Using less towers / spending less on towers will give you a higher score if you can stop the onslaught.

  • Replace towers instead of filling new squares with towers - this will offset some cost of build - again more resources .. more interest.

  • Cover all your key areas with Level 3 Command Towers; for the resource bonus and get these built as soon as you can.

  • Many Shredder or Grinder levels do not get noticably harder after mid way. You should be strong enough around 50-60% through the level to weather most Aliens. Stack interest in Fast Forward as long as you can if your strategy is holding up. (You can get scores in the millions on these modes!)

  • Learn to 'Juggle' (See next section for more details).

  • Sell some of your towers near end few levels of the game, giving some time to accumulate even more interest off the sell value. Be wary not to leave yourself too thin!

  • *Seen other videos where players sell their towers after the last Alien is killed. *Unconfirmed* if this has much benefit as towers do add to your score anyways but does seem to accumulate a small amount of resources (Every bit counts when high-score hunting!)* (Thanks Sneazy)
Advanced: Juggling

In Defense Grid, Aliens always take the shortest path not the path with least resistance to the cores. This means the Aliens aren't smart enough to choose between two paths, always reverting to the shortest option even if that may result more damage. You can use this fact to your advantage exploiting the Aliens direction and keeping them from your cores using Juggling.


The Basics:

This advanced technique can be used on maps where the aliens have several paths to the cores.

Remember, Aliens always take the shortest route. Juggling uses this game mechanic to force Aliens to travel back and forth, i.e. "Juggling", on a single path between two points (Shortcut point & Point of No Return).

It can take some trial and error to determine a good Juggling setup, based on your path design and the tower location you choose for the 'Juggler'.

Some setups simply won't work, but if you do have a setup working it also hinges on your timing/management skills to achieve success.

Advantages of a victory with Juggling include less towers needed to complete a level and more time in game play which along with the decrease in spending on towers will result in a higher score!

If you want to be competitive on the world rankings learning to beat levels with Juggling is a must to master.

This technique is a bit like Neo learning he doesn't have to dodge bullets; you realise that you can use the DG game mechanics to greater advantage essentially controlling the direction of the Aliens on the map. But let me explain this more directly step by step ... time to learn DG Kung-Fu!


Firstly .. for those that would rather watch than read ..

A good example of Juggling (by miendiem) for the last standard level, the Last Stand:

https://www.youtube.com/watch?v=TvBNqKfUkAo

Basic Step on How to Juggle:


Step 1: Setup your path & determine Juggling tower.

The key to how this works is having a tower (Your Juggling Tower) you buy and then sell, placed in a location that when sold will open a shorter path to the cores. Before the Aliens get too far down your main path you sell the 'Juggling tower' and wait a moment for the tower to dissapear. You will notice that the Aliens immediately change direction, recalculating that with your 'Juggling tower' gone going through that square is now the shortest route.

As long at the Aliens havent hit the 'Point of No Return', as in, the point where its shorter to continue down the main path than turning back to the shortcut, then they will change direction.

You now have the Aliens just where you want them stuck in limbo between your Point of No Return and your Juggling tower shortcut.

Step 2: Keeping the Aliens in Limbo.

Now with the Juggling tower sold in Step 1, the Aliens need to travel all the way back, past the towers already hitting them once to take the shorter route. This means they continue to lose hitpoints yet theoretically going backwards on your main path.

Before any (or too many!) Aliens get through the shortcut, buy another Gun tower and block the path again. If you time this well, the Aliens will need to turn around again and travel a good distance back again.

Step 3: Rinse and Repeat.

With the Aliens back on the Main path now, we simply keep 'Juggling' them between the two points; Point of No Return to Shortcut point.

When Aliens getting close to Point of No Return...

Repeat from Step 1: Sell Juggling Tower and wait...

When close to getting through your shortcut again...

Repeat from Step 2: Buy Juggling Tower and wait...

Repeat Step 3 to Victory! :)


Key Considerations:
  • Choose a Gun Tower as your Juggle tower as it is the cheapest to build.
  • Building and Selling a tower does take a small amount of time (As seen with the animations of building/dismantaling) so you will need to ensure you have sufficient distance in your path. The longer the path you create the less Juggling you will need to do and less chance of Aliens sneaking through your shortcut. Aim for a 10 square path or more if you can.
  • A good build for a standard play-through may not be a good build for a Juggling win. Learn the paths the Aliens take and tailor a build suitable for your needs.
  • If you have a good Juggle setup you can choose not to upgrade any towers from Green. In essence it doesn't matter how long it takes to kill the Aliens if you have them stuck in Limbo, and besides will give you more resources earning valuable interest!

  • Remember to still defend against Air attacks. Juggling obviously has no effect on them and can pose a distraction.
  • Time your Juggling with the Alien Waves. Don't get caught out by a new wave coming in and sneaking through the shortcut. Keep an eye on the waves and try to time your buying and selling to ensure new Aliens get stuck in Limbo too.

  • Don't worry if a few get through. This can actually be a benefit as you can split groups, smaller groups that get through can get picked up by inactive towers behind your Limbo zone. Smaller groups have little chance of surviving long alone.
  • Watch out for the fast movers! Depending on your Juggling setup, these can traverse your Limbo zone very quickly often getting out. Negate this with Temporals or ensure you have a long enough route to manage the risk.
  • Use the Aliens Bunching Up together to your advantage. The outcome after several waves of Aliens stuck in the Juggle will naturally herd then together resulting in one or two larger groups. Use Area of Effect towers to maximise your damage output.
Bonus: General Tips & Tactics

The 101 of 'what to do' & 'what not to do' for the best results!

(In no specific order of importance)
  • Always try to have a couple of towers upgraded to Level 3 before Large Aliens approach. You will generally need the DPS.

  • You will not need a Missile Tower too early in most levels but when you start getting Yellow or stronger Air units it will be needed. Generally 2-3 Gun or Cannon towers can cover what a Missile Tower can do.

  • Don’t use the Orbital Laser if you want to get the maximum score.

  • Know thy Enemy & know when key waves are going to hit you. Especially important for timing placement of Missle Towers or Area Damage Towers.

  • Upgrade between waves not during waves. Your towers cannot do damage while being upgraded.

  • Enable Health Bars on the Aliens. Gives clearer indication where damage is being dealt and what ones to look out for. Found in the Options Menu Settings > Interface.

  • The Efficient Opener. Create just Gun Towers till you can get a path to a suitable place for a Choke Point / Killzone. Once established add 1x Laser Tower in vicinity. Now with the Aliens going where you want add 1x Command & 1x Temporal as quickly as you can. Upgrading from this point is priority in a focal point central to your Area towers! (Courtesy of Neroh)

  • Force Aliens past the Exit ASAP. On maps where you have a separate Entrance & Exit points, maximise the longest path available by pushing the Aliens path past the Exit point as soon as you can. This essentially ensures Aliens need to 'double back' on the same path twice from the Exit point onwards, giving max exposure & increasing the distance & damage output.
    (Courtesy of Travathian)

  • Most Towers seem to prioritise fast targets. e.g. if there is a Crasher and Racer in range of a tower, it will attack the Racer first until dead. (Courtesy of Sarkazo)

Supplemental

Need more help with your tower strategies? You can also check out kschang77's Defense Grid 'Strategic View' guide (includes map case studies):

http://gtm.you1.cn/sharedfiles/filedetails/?id=167136142
Bonus: Trading Card Info

Trading Cards were introduced for Defense Grid on the 23rd July, 2013 during the Steam Summer Sale 2013.

Card Facts:
  • You need to collect all 9 unique cards to craft a badge.
  • You get 5 free card drops when you buy the game.
  • There are 5 different badges plus 1 unique foil badge.
Cards drop randomly over time during normal game play.

Booster packs will give you 3 random cards with a chance of a foil drop.

How to Trade:
  • You can swap/trade cards with your friends through your 'Badges' Profile screen.
  • Via Trade Offers (under Discussions > Trading forum) to trade outside your friends list.
  • Or you can buy/sell them from the Community Market.


Badge Crafting Charts (How to):


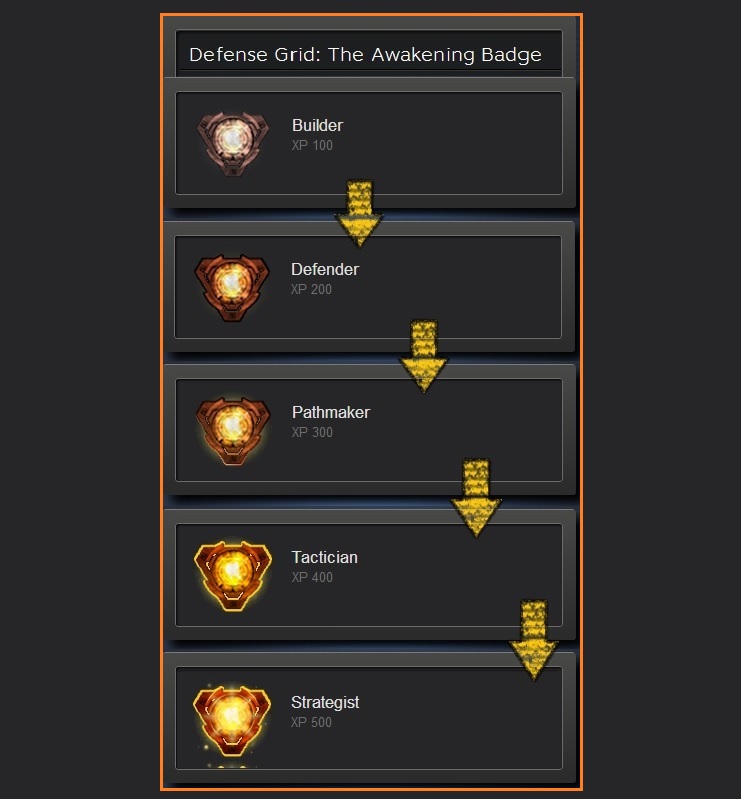
  • Once you have pressed the 'Craft Badge' button, you will received one of the following badges based on your level:

  • (Collect another 9 unique cards to craft the next level of the badge.)


  • Each Badge you craft will also reward you with 2 random items: 1x Background & 1x Emoticon plus a Discount Voucher.

  • Some Backgrounds & Emoticons are Uncommon or Rare to drop when you craft a badge.

  • Here is what you can collect:


  • You can also collect Foil versions of the above badges by crafting a set of 9 unique Foil cards. This will give you additional XP for your Steam Level.

  • Foil badge does not replace Standard badge.

  • Any Card Drop or Booster Pack has a small chance of dropping a Foil card.
Appendix
Change Log | Notes

Did I miss something?

Got a good tip or tactic?

Could I improve this guide?

Your constructive feedback is welcome!


*** Please give me a 'Thumbs Up' if you found this guide helpful ***


<< < Read My Review here! > >>


AUSSIEDROID'S CURATOR @
http://gtm.you1.cn/storesteam/curator/6857016/

AUSSIEDROID'S WORKSHOP CONTRIBUTIONS @
http://gtm.you1.cn/id/aussiedroid/myworkshopfiles/?section=guides

TRUE BLUE REVIEWS (Find More Quality Guides) @
http://gtm.you1.cn/groups/TrueBlueReviews


* 1.9 (31st Oct 14) - Updated Follow Me in Appendix. *
* 1.8 (5th Sep 14) - Added Fast target prioritisation w/ Towers Tip. Thx Sarkazo *
* 1.7 (31st Mar 14) - Spelling correction under 'Scoring' section. Thx WE'LLDOITLIVE *
* 1.6 (23rd Feb 14) - Updated Juggling section & DG Victory Orange headers added! FTW! *
* 1.5 (11th Feb 14) - Minor Update to Appendix section. *
* 1.4 (30th Dec 13) - Added Concussion dmg vs Invisible enemy. Thx Liro Raeriyo *
* 1.3 (13th Nov 13) - Added Blue Theme headers. *
* 1.2 (25th Aug 13) - Added Steam Trading Cards Info section, Sup. Guide link + other refinements. *
* 1.1 (9th May 13) - Moved Change Log to new Appendix section. *
* 1.0 (28th Mar 13) - Force Aliens past the Exit ASAP tip added. Thx Travathian *
* 0.9 (20th Mar 13) - Added Natural Choke Point strategy to 'Getting Started'. Thx BoInGyman_™ *
* 0.8 (12th Mar 13) - Added 'Juggling' Topic. Thx Ganjafear for suggestion. *
* 0.7 (9th Mar 13) - Redefined range of effect of towers. Thx unIQue. To do: Juggling Section *
* 0.6 (17th Feb 13) - Updated Max Score Picture. Formatting Updates. *
* 0.5 (8th Feb 13) - Expanded on Tesla Tower damage & use. Thx anon1mat0 & Etherlight!. *
* 0.4 (30th Jan 13) - Corrections to Cannon Tower description & LoS. *
* 0.3 (26th Jan 13) - Additional Killzone Screenshots Plus More + Formatting update. *
* 0.2 (22nd Jan 13) - Added 'Getting Started' & 'Advanced' topics + other minor improvements. *
* 0.1 (20th Jan 13) - Initial Draft Release *
108 Comments
Uxot 13 May, 2022 @ 9:29pm 
FFS lockdown is impossible....
Argon 15 Aug, 2021 @ 9:01pm 
Exactly what Aussie said
Argon 15 Aug, 2021 @ 8:59pm 
@GOP3_Steals_Chips No they don't, just played the third to last mission, no interest while the cores are floating back to you, the video proves my point, go to 11:07, and you can see you are not accruing any interest what-so ever.
Aussiedroid  [author] 15 Aug, 2021 @ 8:31pm 
The amount of interest you earn will depend on the number of cores in the housing. I can't see from your video but assume you had some still in there accumulating the interest, but if you had all of your cores in there you will earn more interest. Each core in housing will increase this accumulating.

Cheers, AD
Big Bobby Sue 15 Aug, 2021 @ 10:57am 
Dude. Interest accrues when they are floating back after the aliens are dead. Nothing else could be making the resources increase. ALL the aliens are DEAD. It's very obvious. In fact, go marvel at my large achievement and at the end watch the resources go up after everyone's dead. This is why selling towers back at the end works, if there's enough time: interest is still accruing. (I didn't sell any back.)

https://www.youtube.com/watch?v=27NHpiK7T2Q
Aussiedroid  [author] 14 Aug, 2021 @ 5:36pm 
Thanks GOP3 Steals Chips, Argon & Sirius ⓈⓁ!

Interest will only accumulate when the cores are in the housing not when floating back.

You may be right on the other point ... been a while since I have played :emofdr:

Have fun,
AD
Big Bobby Sue 14 Aug, 2021 @ 10:27am 
Hi. Thanks for this great guide!

Couple of things:

When the distance is the same but they have two paths, they avoid cannons in favor of guns. (That's what I see, anyway.)

You do get interest when cores are floating back, you can see it at the end of a level after the aliens are dead.
Argon 3 May, 2020 @ 11:23pm 
Nice
Sirius (S)(L) 29 Dec, 2019 @ 10:47pm 
Sweet ... thank you.
Aussiedroid  [author] 13 Jan, 2019 @ 1:49pm 
Thanks Afro Moose! Enjoy!